
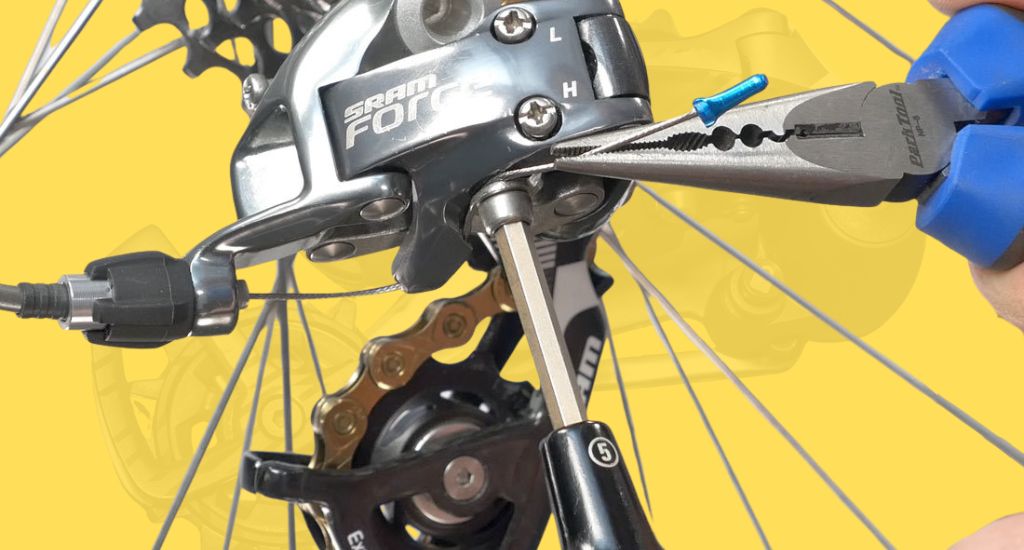
A bike that shifts poorly can turn any ride into a struggle. Adjusting a mountain bike derailleur helps you ride smoothly, avoid chain drops, and protect your drivetrain.
Most shifting problems don’t need new parts. With simple tools, you can adjust limit screws, B-tension, and indexing to fix your gears quickly.
This beginner-friendly guide explains every step clearly. Keep reading to learn Derailleur Adjustment Tips, how to adjust the front derailleur, how to adjust the rear derailleur, and how to tune your derailleur with basic tools for beginners for perfect gear performance.
How to Adjust a Mountain Bike Derailleur (Rear Derailleur Guide)
Adjusting your rear derailleur keeps your gears smooth and reliable. Proper setup prevents chain drops, noisy shifting, and premature wear. Even beginners can handle this with patience and basic tools.
Tools Needed Before You Start
Before you touch screws, gather the right tools. This prevents frustration and mistakes, making derailleur adjustment safe and effective for beginners.
Tools:
- Allen keys: 4mm or 5mm (most common)
- Bike stand (optional but helpful)
- Clean rag
- Degreaser (optional)
- Patience
Initial Checks Before Adjusting the Derailleur
Skipping checks is a common cause of failed adjustments. Confirm drivetrain cleanliness, derailleur alignment, and bike position to ensure smooth shifting before touching screws.
Clean the Drivetrain
Chain, cassette, and jockey wheels must be free of dirt. A dirty drivetrain will shift poorly even if the screws are perfectly set, creating frustration and wasted effort for beginners.
Check the Derailleur Hanger Alignment
A bent hanger causes shifting issues that cannot be corrected by limit screws or cable tension. Ensure the hanger is straight or replace it before adjusting the derailleur for accurate results.
Bike Positioning
Secure the bike in a repair stand or elevate the rear wheel so the pedals spin freely. Proper positioning gives clear access and allows adjustments while the drivetrain moves smoothly.
Understanding Rear Derailleur Adjustment Screws
Before making adjustments, know what each screw does. Understanding limits reduces errors and confusion, especially for riders new to bike maintenance.
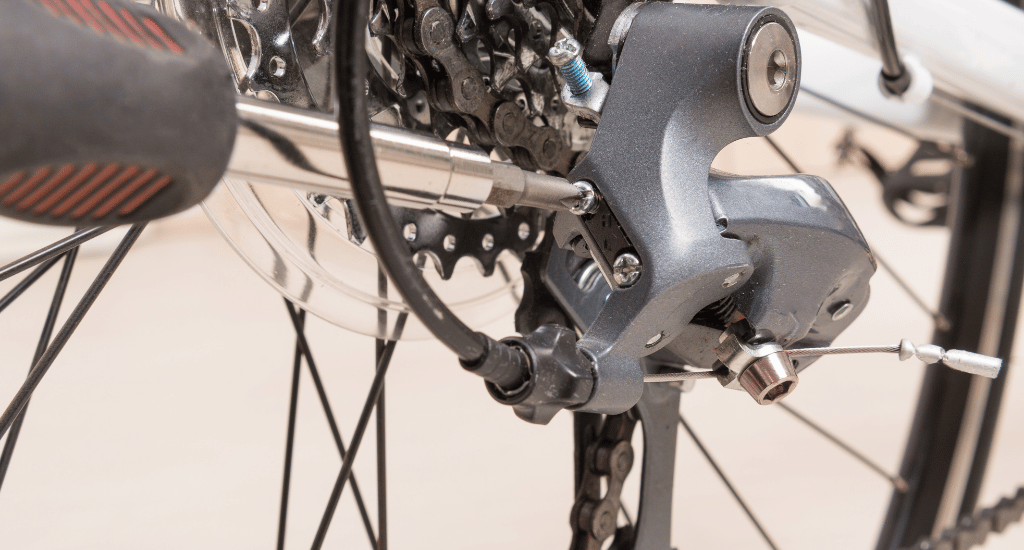
- H screw (High limit): controls the smallest cog alignment.
- L screw (Low limit): controls the largest cog alignment.
- B-tension screw: sets the gap between the upper pulley and the largest cog.
- Barrel adjuster: fine-tunes cable tension for accurate indexing.
Each screw has a specific purpose. Adjusting one affects shifting differently, so tackle them in the correct order to avoid repeated mistakes.
Step 1: Adjusting the High (H) Limit Screw
Shift the chain to the smallest cog. View the derailleur from behind and align the upper jockey wheel with the cog.
Turning clockwise moves the derailleur inward; counter-clockwise moves it outward. The goal is to prevent the chain from falling toward the frame. Adjust until there’s no rubbing or hesitation while pedaling.
Check shifting across a few gears after adjustment to confirm smooth performance on the smallest cog.
Step 2: Adjusting the Low (L) Limit Screw
Shift to the largest cog. Align the upper jockey wheel with the cog to ensure proper chain engagement.
Clockwise rotation limits inward movement; counter-clockwise allows outward movement. The objective is to prevent the chain from falling into the spokes while maintaining smooth contact.
Test several gear changes to verify the chain rolls cleanly on the largest cog without hesitation or noise.
Step 3: Adjusting B-Tension (Pulley-to-Cog Gap)
Shift to the largest cog and locate the B-tension screw at the rear of the derailleur. Maintain a 5-6 mm gap between the top jockey wheel and cog.
Clockwise increases the gap; counter-clockwise decreases it. Too small a gap causes noisy shifts; too large a gap makes gear changes slow or inaccurate. Fine-tune until shifting feels quiet and precise.
Check multiple cogs to confirm smooth performance across the cassette after adjustment.
Step 4: Fine-Tuning Cable Tension (Indexing)
Shift to the second smallest cog and pedal continuously. Adjust the barrel for smooth upshifts and downshifts.
If moving to a bigger cog is slow, turn the barrel counter-clockwise. For slower downshifts, turn clockwise. Adjust in ¼-turn increments, cycling through all gears to ensure consistent, smooth shifting.
Indexing may take a few tries, but small adjustments bring precise and effortless gear changes.
Pro Tip: Resetting Cable Tension for Major Issues
If indexing fails, start fresh. Loosen the cable clamp bolt and align the derailleur under the smallest cog manually.
Re-clamp the cable lightly, then restart indexing. This approach fixes severe misalignment and ensures the derailleur responds correctly to barrel adjustments, saving time and frustration.
Common Mountain Bike Derailleur Problems and Fixes
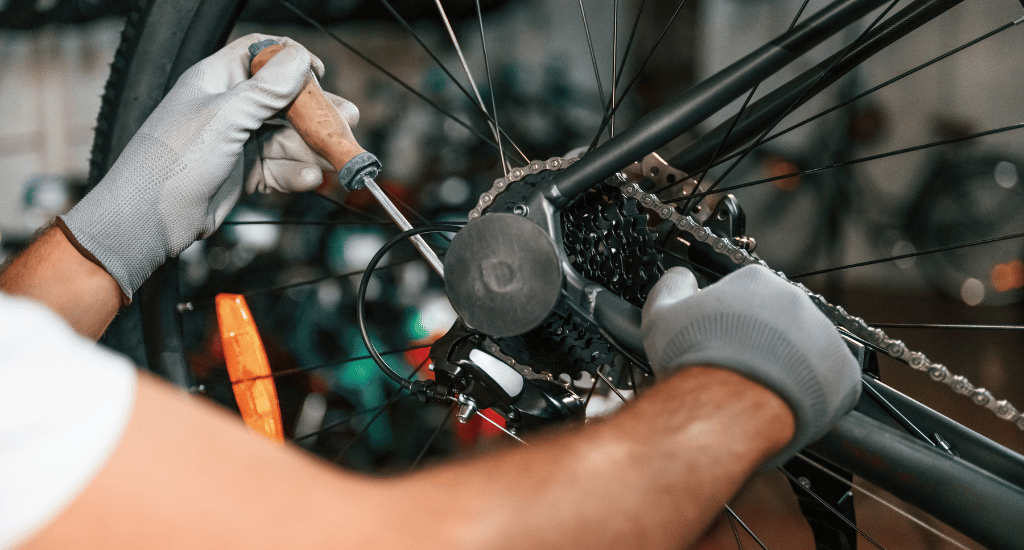
Rear derailleur problems usually start small but grow fast if ignored. Poor shifting, noise, or chain drops can ruin rides and damage parts. These common issues have clear causes, and most fixes only need careful adjustment, not new components.
Chain Skips Gears
Gear skipping often comes from incorrect cable tension. The derailleur fails to line up fully with the cog, so the chain jumps under pressure. Worn chains or cassettes can also cause skipping, even after proper adjustment.
Chain Drops Off Cassette
Chain drops happen when H or L limit screws allow too much derailleur travel. The chain can fall toward the frame or spokes. A bent derailleur hanger also causes this issue and must be fixed before adjustments.
Shifting Is Noisy in Certain Gears
Noise usually points to an incorrect B-tension gap. The jockey wheel may sit too close or too far from the cassette. Dirt on the chain or cogs can worsen noise, even if adjustments seem correct.
Gears Feel Slow to Change
Slow shifting often means low cable tension or dry cables. The derailleur moves late and hesitates between gears. A small barrel adjuster turn can restore speed, but stiff cables may need lubrication or replacement.
Gears Won’t Reach All Cogs
This problem appears when the limit screws block full derailleur movement. The chain cannot reach the smallest or largest cog. A correct limit screw setup ensures safe access to every gear without chain drops.
Beginner Mistakes to Avoid When Adjusting a Derailleur
Derailleur adjustment feels simple, but small mistakes cause big problems. Beginners often rush steps or skip checks, which leads to poor shifting, chain drops, and repeated adjustments that never fully fix the issue.
- Adjusting Cable First: Changing cable tension before limit screws causes confusion and prevents accurate gear alignment across the cassette.
- Ignoring Hanger Alignment: A bent derailleur hanger ruins shifting accuracy, and no screw adjustment can fix this problem.
- Large Barrel Turns: Big barrel adjuster turns overcorrect tension and makes shifting worse instead of better.
- Dirty Bike Adjustments: Adjusting on a dirty drivetrain hides real issues and leads to false results.
- Skipping Gear Tests: Not cycling through all gears after each change allows problems to remain unnoticed.
- Rushing the Process: Lack of patience leads to missed steps, repeated errors, and unreliable shifting performance.
Conclusion
A well-set derailleur makes every ride smoother and safer. How to adjust a mountain bike derailleur improves shifting, stops chain drops, and protects expensive drivetrain parts. Regular adjustment also saves money by reducing the need for frequent bike shop visits.
Check your derailleur after muddy rides or any crash. Always follow the correct order: limit screws first, then B-tension, and cable indexing last. This habit keeps your bike reliable, quiet, and ready for every trail.
FAQs
What do H and L mean on a mountain bike derailleur?
H and L mark the limit screws on a mountain bike derailleur. H sets the high gear, which is the smallest cog. L sets the low gear, which is the largest cog, and stops the chain from overshooting on the cassette.
What gear should my bike be in when adjusting the derailleur?
Your bike should be in specific gears during adjustment. Use the smallest cog for the H screw. Shift to the largest cog for the L screw and B-tension. Use the second smallest cog when setting cable tension for best results.
How often should I adjust my MTB derailleur?
Adjust your MTB derailleur when shifting quality changes. Cable stretch over time often needs correction. Crashes can knock parts out of line. Noise or missed shifts also signal the need for adjustment, even on well-maintained bikes after long rides.
Can I adjust a derailleur without a bike stand?
Yes, you can adjust a derailleur without a bike stand. The task becomes harder and slower. Lift the rear wheel off the ground so the cranks and gears can move freely with blocks or careful support at home first.


