Gears that skip or jam turn a smooth ride into a frustrating struggle. Learning how to adjust gears on a mountain bike can stop this problem and make every ride easier and safer.
Proper gear adjustment keeps your bike running smoothly. It helps you climb hills without extra effort, shift cleanly on trails, and avoid chain drops. Signs like grinding sounds, chain slipping, or missed shifts show that your rear or front derailleur needs attention.
This guide will show simple steps for tuning a mountain bike, fixing cable tension, setting limits, and more. Keep reading to learn how to adjust your MTB gears like a pro.
Tools You Need to Adjust MTB Gears
Before you start, gather the right tools. Having them ready makes gear adjustment faster and prevents mistakes. A few simple items cover most MTB tuning tasks.
- Allen keys (4mm-6mm): Tighten bolts on derailleur and shifters securely.
- Bike stand (optional): Holds your bike steady while adjusting gears.
- Screwdriver for limit screws: Adjust H and L limits on the derailleur.
- Chain checker (optional): Measure chain wear to keep smooth shifting.
- Small rag or cloth: Clean grime from the chain and derailleur before tuning.
- Lubricant: Keep the chain and derailleur moving freely during adjustment.
How to Adjust Gears on a Mountain Bike
Adjusting your MTB gears may seem tricky, but following a step-by-step routine makes it simple. Correct adjustment prevents chain skipping, smooths shifts, and extends your drivetrain life. These steps cover front and rear gears for a reliable ride.
Step 1: Shift to the Smallest Gears
Start with the chain on the smallest front chainring and the smallest rear cog. This position keeps tension low and makes it easier to adjust the derailleur. Starting correctly ensures all limit and cable adjustments line up precisely.
Step 2: Check the Derailleur Hanger Alignment
A bent derailleur hanger causes poor shifting and chain rub. Inspect it visually for twists or bends. If it looks off, a professional alignment tool may be needed to restore proper positioning. Correct alignment avoids repeated tuning problems.
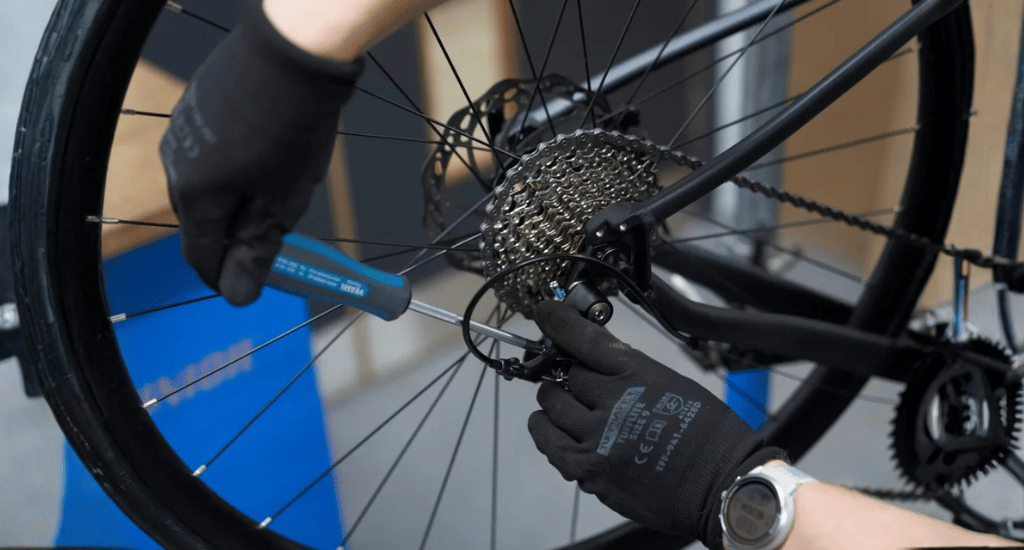
Step 3: Adjust the High and Low Limit Screws
Limit screws control how far the derailleur moves side to side. Set the H (high) and L (low) screws carefully to prevent the chain from overshooting or dropping off the cassette or chainring. Proper limits protect your chain and bike.
Step 4:Set Cable Tension Correctly
Use the barrel adjuster to tighten or loosen the shift cable. Too much tension makes shifting stiff; too little causes missed shifts. Adjust gradually and shift through gears to find the balance for smooth operation.
Step 5: Fine-Tune Indexing Gear by Gear
Shift the chain through each cog while pedalling lightly. Turn the barrel adjuster slightly to smooth out any jumps or hesitation. This step ensures every gear clicks perfectly under light load.
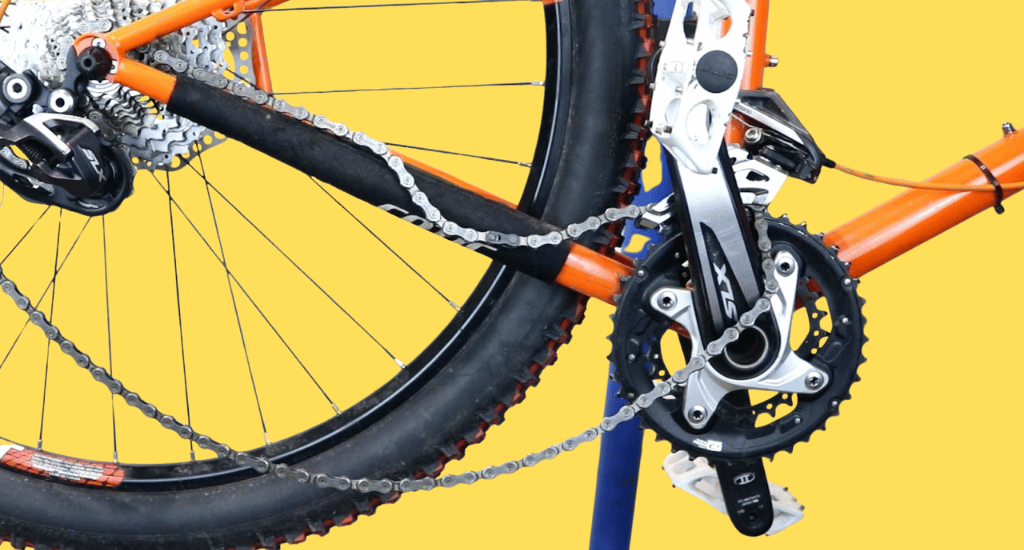
Step 6: Adjust the B-Tension Screw
The B-tension screw sets the gap between the derailleur and cassette. Proper spacing prevents chain slap and improves shifting on large cogs. This adjustment is important for modern wide-range cassettes used on most MTBs.
Step 7: Test Ride and Make Micro Adjustments
Take your bike on a short ride and shift under real conditions. Fine-tune cable tension and limits if needed. Real-world testing ensures smooth shifts across trails, hills, and flat sections for confident riding.
When to Adjust Gears Yourself vs Visit a Bike Shop
Knowing when to handle bike gear adjustments on your own can save time and money. Some fixes are simple and safe, while others need professional tools or experience. Recognizing the difference keeps your MTB shifting smoothly.
Adjusting Gears Yourself
Simple problems like chain slipping, minor cable tension, or misaligned limit screws can be done at home. Basic tools and patience are enough for most riders. Doing it yourself helps you understand your bike better.
- Shift into the smallest and middle chainrings before adjustment.
- Use the barrel adjuster for fine cable tension changes.
- Check H and L screws for chain drop issues.
- Clean chain and derailleur for smooth movement.
- Test ride after each minor tweak to ensure proper shifting.
Visit a Bike Shop
Complex problems, such as bent derailleur hangers, damaged cogs, or persistent skipping, are best handled by a professional. Modern MTB drivetrains have precise tolerances that need special tools and expertise.
- Bent hanger repair requires a professional alignment tool.
- Worn cassettes or chainrings may need replacement.
- Advanced drivetrains need calibrated indexing adjustments.
- Persistent noise or a chain drop may indicate hidden damage.
- Mechanics can fine-tune B-screw and cable tension safely.
Common Mountain Bike Gear Problems and Fixes
Mountain bike gears face stress every ride. Dirt, mud, chain wear, or minor misalignments can cause issues. Recognizing common problems early helps you fix them yourself, avoid bigger repairs, and keep your MTB running smoothly on trails.
Gears Skipping or Slipping
Gear skipping often happens when the shift cable stretches over time or when chainrings, cogs, or the chain are worn. Tightening or replacing the cable and worn components usually restores smooth shifting and stops the chain from jumping unexpectedly.
Chain Rubbing or Noise While Shifting
A chain rubbing or making noise usually comes from limit screw issues or poor indexing. Adjust the H and L screws and fine-tune cable tension so the derailleur guides the chain precisely. Clean the chain for quiet, smooth shifts.
Chain Falling Off the Cassette
When the chain falls off the cassette, the low or high limit screws may be set incorrectly. A bent derailleur hanger can also misalign the chain path. Correcting the limits and aligning the hanger keeps the chain on track.
Stiff or Hard Shifting
Shifts that feel stiff or resist movement often result from dirty or worn cables, dry chain links, or old housing. Cleaning, lubricating, and replacing worn parts restores smooth gear changes and prevents extra stress on the drivetrain.
Difficulty Shifting Under Load
Struggling to shift while climbing or pedalling hard usually means the cable tension is off or the derailleur spring is weak. Adjusting tension and checking the derailleur ensures smooth performance, even under heavy load or rough trail conditions.
Conclusion
Adjusting your mountain bike gears may seem tricky at first, but following a step-by-step approach makes it manageable. From setting the chain on the smallest gears to fine-tuning the B-screw and cable tension, each step ensures smooth shifting and prevents chain problems.
Regular drivetrain maintenance keeps your bike performing well and extends the life of your chain, cassette, and derailleur. Practising basic MTB tuning builds confidence, helps you spot issues early, and makes every ride more enjoyable. Start small, follow the steps, and watch your gears work flawlessly.