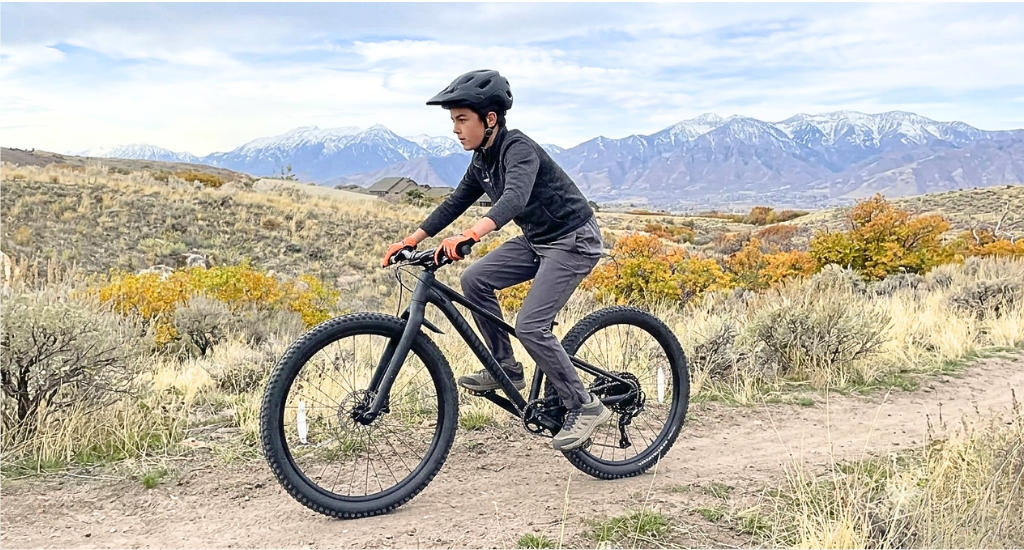
A loose crank often shows up as a side wobble, a small clicking sound, or weak pedal power. This problem can harm the crank arm, spindle, and bottom bracket if you keep riding.
You can solve this issue with simple checks and the right tightening steps in many cases. Some parts wear out over time, and then a new crank or bottom bracket becomes the safer choice.
This guide explains how to fix a loose crank on a mountain bike with clear steps, tools, and signs that tell you when to repair or replace parts.
How to Fix a Loose Crank on a Mountain Bike (Step-by-Step)
A loose crank can feel annoying at first, but it can turn serious very fast. This section will explain how to fix a loose crank on a mountain bike with clear steps that anyone can follow safely.
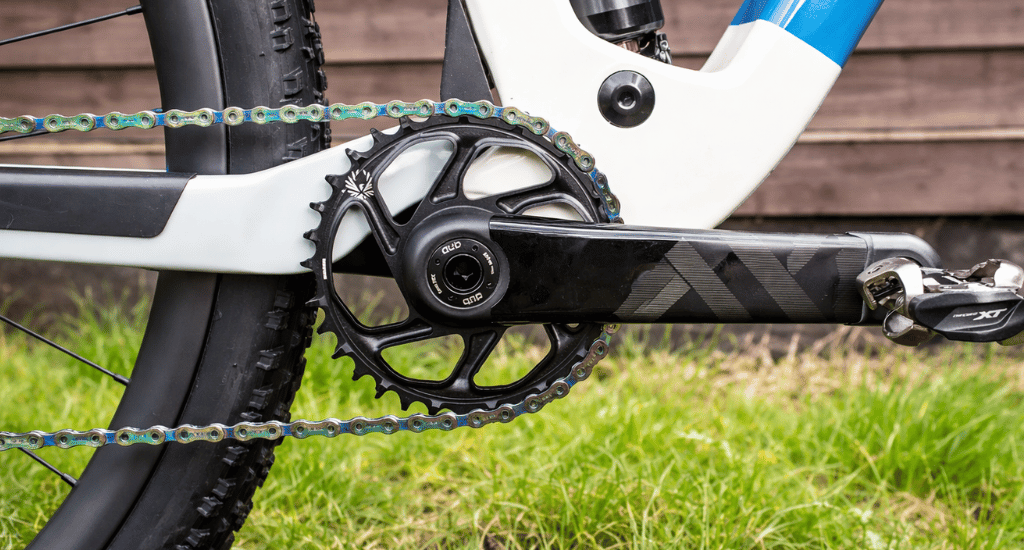
Step 1: Identify the Type of Crank System
Every mountain bike does not use the same crank system, so you must check this first. The fixing method depends on the crank design, and wrong steps can damage parts easily.
There are three common types you will see:
- Square taper: Older design with a square-shaped spindle end
- Splined systems (ISIS or Octalink): Have grooves that lock the crank in place
- External systems (Hollowtech II): Use a spindle attached to one crank arm
This step matters because each system needs a different tool and tightening method. A square taper crank needs a puller tool, while external systems use pinch bolts and caps.
If you skip this check, you may apply the wrong force and ruin the crank arm or spindle.
Step 2: Inspect the Crank Arm and Spindle
Before you tighten anything, you should take a close look at the crank and spindle condition. A damaged part will not stay tight, even after proper fixing.
Check for these signs:
- Side-to-side wobble when you move the crank arm by hand
- A loose fit between the crank arm and the spindle
- Rounded or worn contact surfaces
If the crank arm hole looks stretched or smooth inside, it means the fit is gone. It happens after long use with a loose bolt.
In such cases, repair will not last long. The crank arm no longer grips the spindle tightly, so replacement becomes the only safe option.
Do not ignore this step, because tightening a damaged crank can make the problem worse.
Step 3: Tighten the Crank Bolt or Fixing Bolt
Now move to the main fixing point, which is the crank bolt or fixing bolt. This bolt holds the crank arm tightly on the spindle.
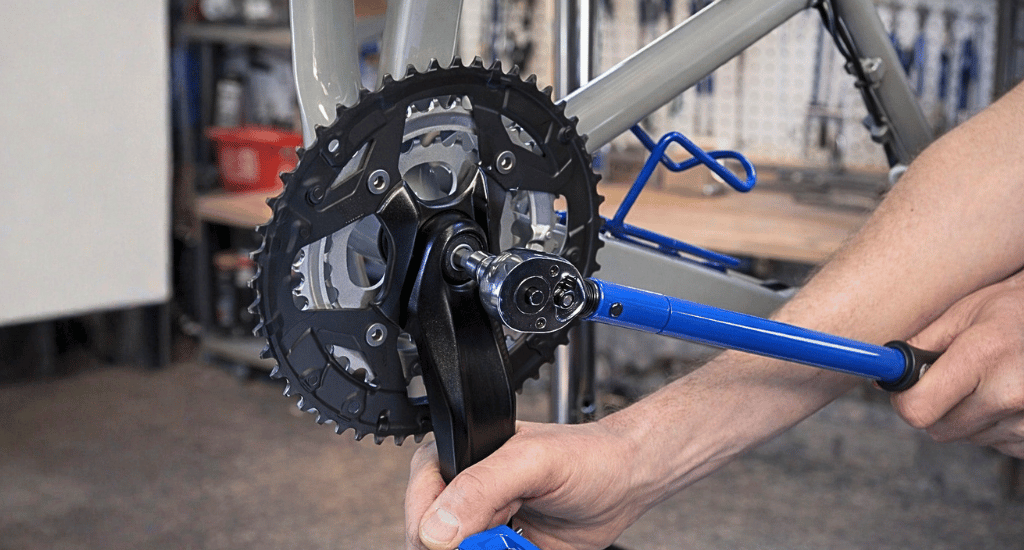
You will need:
- An Allen key, usually 8mm
- Or a socket tool, based on your crank type
Insert the tool and turn the bolt clockwise until it feels firm and secure. Most cranks need a torque range between 35 to 50 Nm, which keeps them tight without damage.
A loose bolt allows small movement during each pedal stroke. This movement slowly wears out the crank arm and spindle contact area. That is why early tightening can save your parts and avoid costly replacement later.
Step 4: Reinstall Properly (Critical Sequence)
If you removed the crank or parts, proper reinstallation becomes very important. The wrong order can result in the same loose crank issue again.
Follow this exact sequence carefully:
- 6 Put the spindle bolt back in and crank it all down
- 7 Tighten the pinch bolt if your system uses a two-piece crank
- 8 Last step: Put the chain back on
Each step plays a role in keeping the crank secure. The spindle bolt sets the main pressure, while the pinch bolt locks the crank arm in place.
If you tighten the pinch bolt first, the crank may not sit correctly on the spindle. This mistake often leads to quick loosening after a short ride. Always follow the correct order to make the fix last longer.
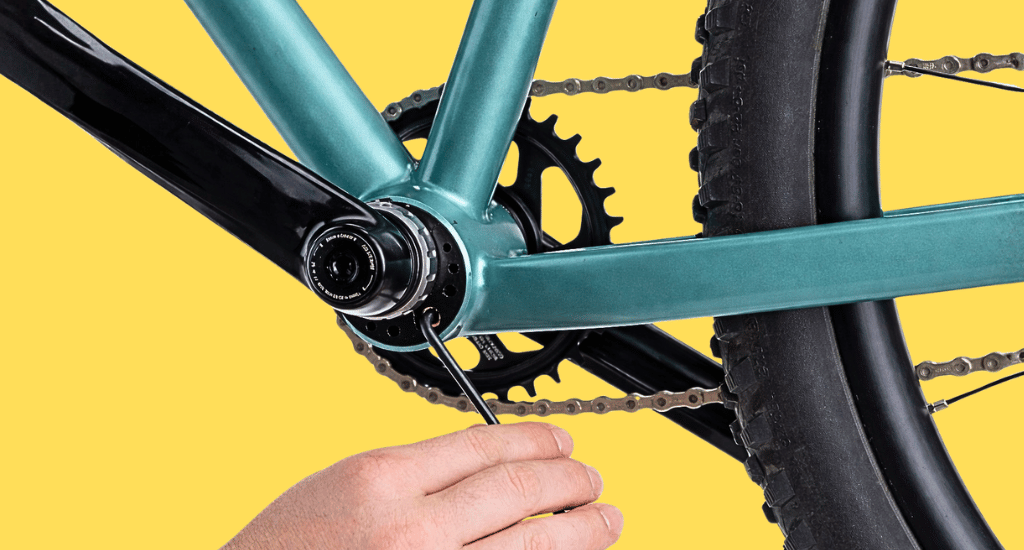
Step 5: Check Bottom Bracket Tightness
If the crank still feels loose, the issue may come from the bottom bracket. This part sits inside the bike frame and supports the spindle.
Hold both crank arms and try to move them sideways. Any play in this area shows a loose or worn bottom bracket.
Important parts to check:
- Locking ring
- Bearing cup
These parts have small notches that require special tools for adjustment.
Tools you may need:
- Bottom bracket tool
- Hook spanner
Without proper tools, it becomes hard to tighten these parts correctly. Using the wrong tool can also damage the notches, which makes future repair difficult.
Step 6: Tighten or Adjust Bottom Bracket
If you find looseness in the bottom bracket, you need to tighten or adjust it properly. This step often confuses beginners because the direction is not the same as the pedals.
Here is the key rule:
- Bottom bracket threads move opposite to pedal threads
- To loosen it, turn toward the front of the bike
This direction feels unusual at first, so take your time and check before applying force.
A common mistake is turning the wrong way, which can strip the threads inside the frame. Once threads get damaged, repair becomes difficult and expensive.
You should use steady pressure and correct tools to avoid this problem. Proper adjustment will remove play and improve crank stability.
Step 7: Test Ride and Recheck
After all adjustments, take a short test ride to check the result. Ride slowly and pay attention to how the crank feels under load.
Watch for these signs:
- Any remaining wobble
- Clicking or knocking sounds
- Loss of smooth pedal motion
After the ride, you should check the crank bolt again to ensure it stays tight. Small adjustments after the first ride help secure everything properly.
This final step confirms that your work on fixing a loose crank on bike is complete and safe for regular riding.
Common Causes of a Loose Crank
A loose crank does not happen without a reason, and small issues often lead to bigger damage later. Understanding the cause helps you fix the problem faster and avoid repeat trouble on future rides.
Loose or Under-Torqued Crank Bolt
The most common cause is a crank bolt that is not tight enough. This usually happens after installation when the proper force was not applied.
A loose bolt allows slight movement with each pedal stroke. Over time, this small movement wears the contact area and creates a bigger gap. Once this happens, the crank arm starts to wobble and may come off completely if ignored.
Worn or Damaged Crank Interface
The crank interface is the contact point between the crank arm and the spindle. This area must stay tight for smooth and safe riding.
In square taper systems, the square hole can become rounded after long use. In splined systems, the grooves may wear down and lose their grip.
When this wear becomes serious, the crank arm cannot sit firmly on the spindle. Tightening the bolt will not fix the problem for long, so replacement becomes necessary.
Bottom Bracket Issues
The bottom bracket supports the spindle and keeps the crank system stable. If this part becomes loose or worn, the crank will not stay secure.
Loose cups or worn bearings can create side movement in the spindle. Misalignment inside the frame can also affect how the crank sits and rotates.
These problems often cause noise, rough movement, and a loose crank feeling during rides.
Pedal or Chain Stress
Strong pedaling force and rough terrain can slowly loosen crank parts over time. This stress puts extra pressure on bolts, threads, and contact surfaces.
Frequent hard riding without regular checks can speed up wear in the crank system. Small looseness at first can turn into a major issue if you continue riding without inspection.
When You Need to Replace the Crank or Bottom Bracket
Some problems cannot be fixed with simple tightening, and worn parts often need full replacement. If you ignore these signs, the damage can spread and affect other parts of your bike system.
Crank Arm Falls Off While Riding
If the crank arm comes off during a ride, the damage is usually already serious. It happens when the crank stays loose for too long without proper repair.
In most cases, you will need a new crank arm because the old one loses its tight fit. The bottom bracket may also need replacement if the spindle or bearings show wear.
Reinstalling the same crank often fails because the contact area no longer holds firmly.
Deformed Crank Arms
A deformed crank arm cannot sit tightly on the spindle, even after proper tightening. This damage happens when the crank stays loose and wears out the inner contact surface.
Once the shape changes, the crank loses its grip completely. No simple repair can restore the original fit or strength. The only safe solution in this case is to replace the crank arm with a new one.
Damaged Bottom Bracket Threads or Bearings
The bottom bracket can also cause serious problems when its threads or bearings get damaged. You may feel grinding, resistance, or uneven movement while pedaling.
Loose or worn bearings create play in the spindle, which affects crank stability. Damaged threads make it hard to tighten the bottom bracket securely. If these issues appear, replacement becomes the best option to restore smooth and safe performance.
Don’t forget to check our blog on loose bicycle pedal. It will surely help your future bike adventures positively.
Final Thought
Most loose cranks can be fixed with proper bolt tightening and correct reinstallation steps. If parts show wear or damage, replacement becomes the only reliable option for long-term safety.
Early checks will help you avoid serious damage and expensive repairs later. Regular maintenance keeps your drivetrain smooth, stable, and safe for every ride. So, you should maintain your ride with proper care.