A bent mountain bike rim can ruin a smooth ride on rough trails. The wheel may shake side to side, brakes may rub the rim, and tires may lose air after hard hits on rocks or potholes.
Many riders feel worried after they notice this damage, yet most rim bends have a simple fix at home. A careful spoke adjustment can reduce wheel wobble, and gentle pressure can push the rim edge back into shape. Basic tools like a spoke wrench or an adjustable wrench often solve the issue without a bike shop visit.
This guide explains how to fix a bent mountain bike rim step by step. You will also learn how to inspect damage and decide when repair remains safe.
How to Fix a Bent Mountain Bike Rim (Step-by-Step)
A bent rim may look serious, yet many cases have a simple home repair. Careful inspection and small spoke adjustments can restore the wheel shape. This section explains how to fix a bent rim on a mountain bike with clear steps.
Step 1: Identify Where the Rim Is Bent
The first step requires a clear look at the wheel shape. A bent section often shows uneven movement when the wheel spins slowly during inspection.
Turn the bike upside down and rotate the wheel with your hand. Watch the rim edge closely as it passes the brake pads or frame. The point with the largest wobble shows the main bend.
Check these signs during inspection:
- Spin the wheel while the bike sits upside down
- Notice the side-to-side wheel movement, which shows a lateral bend
- Look for up and down motion that forms a small wheel hop
- Use steady reference points like:
- brake pads
- frame stays
- a zip tie attached to the frame
Important detail to remember:
- The furthest point of out-of-trueness marks the exact spot where spoke adjustment should begin.
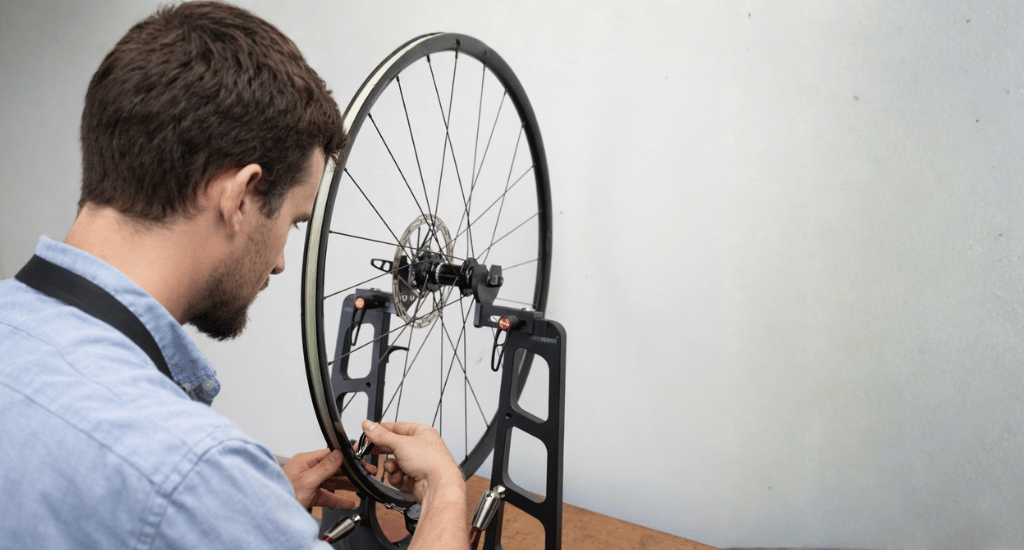
Step 2: Tighten or Loosen Spokes to True the Wheel
Spokes hold the rim in a round and straight position. Small spoke changes can pull the rim toward the correct shape and remove the wobble.
Locate the section with the largest wobble and focus on that area. A spoke wrench helps turn the spoke nipples slowly. Gentle changes keep the wheel balanced and prevent extra damage.
Use these basic spoke rules:
- Tighten spokes at the furthest point of out-of-trueness
- Use a spoke wrench for careful adjustment
- A spoke ruler or spoke gauge helps check even spoke tension
- Tighten the spoke on the opposite side of the wobble
- Turn the nipple one quarter turn each time
Helpful tip:
- Excess spoke tension can bend the rim further and create new wheel problems.
Step 3: Fix a Dented Rim Edge (Bead Lip Damage)
Some rim damage appears on the outer edge where the tire rests. This rim section is called the bead seat, which holds the tire bead firmly in place.
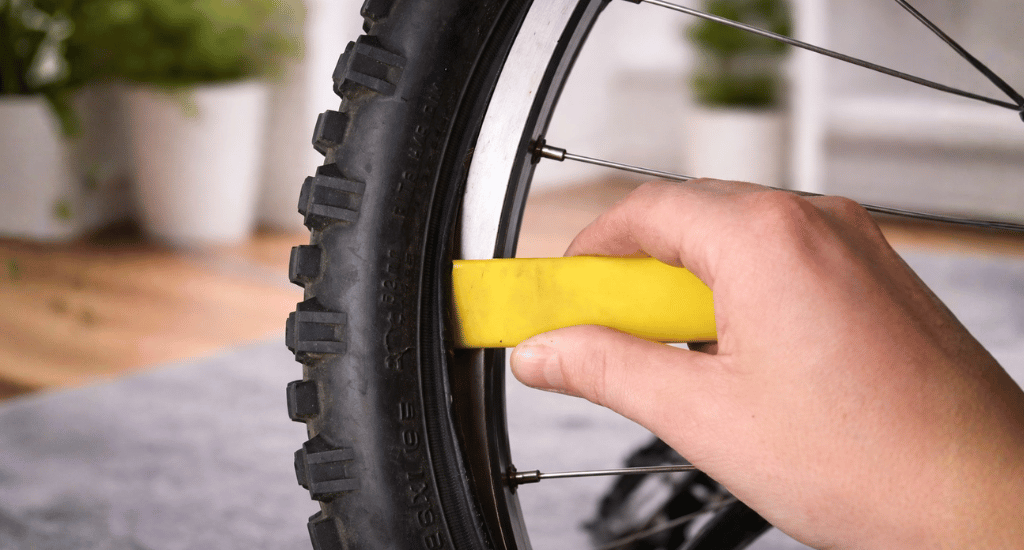
A dented bead lip often causes air leaks on tubeless wheels. Careful pressure can move the metal edge back to its normal position and restore proper tire sealing.
Follow these repair steps:
- Use a large adjustable wrench to grip the bent rim edge
- Bend the bead lip slowly back into shape with one smooth motion
- Apply gentle pressure and avoid sudden force
- Check the rim shape after each small correction
Important warning:
- Aluminum rims weaken after repeated bending, so avoid many correction attempts on the same spot.
Step 4: Correct Vertical Bends (Radial Truing)
A vertical bend causes the wheel to move up and down during rotation. Riders often describe this issue as a wheel hop or bounce.
Radial truing uses the same spoke adjustment idea as wobble correction. The difference lies in spoke pairs around the raised rim section, which must change together.
Use these steps to correct the hop:
- Find the highest point of the hop during wheel rotation
- Tighten spokes around that area to pull the rim inward
- Adjust nearby spokes evenly on both sides
- Work in small turns to keep wheel tension balanced
Step 5: Recheck Wheel Alignment
Final inspection confirms that the wheel returns close to its natural shape. Slow wheel rotation helps reveal small movements that still need correction.
You should take a careful look at the rim while the wheel spins again. The gap between the rim and the brake pads should remain nearly the same during each full rotation.
Check these final points:
- Spin the wheel again for a full inspection
- Confirm the rim shows minimal wobble
- Ensure brake pads no longer rub against the rim
- Check that the tire bead sits evenly around the rim
Acceptable tolerance:
- About 1-2 mm lateral movement remains normal for many mountain bike wheels.
How to Tell If Your Bike Rim Is Bent
A bent rim often shows clear warning signs during normal rides on rough mountain trails. Hard hits from rocks or potholes can change the rim shape and affect wheel movement.
These changes may cause small riding problems that feel unusual on smooth or rough paths. Early inspection helps prevent further wheel damage and keeps the bike safe during trail rides.
Common Signs of a Bent Mountain Bike Rim
A bent rim usually creates visible and noticeable problems during wheel rotation. Riders often notice uneven wheel movement or brake contact after a strong trail impact.
Look for these common signs:
- Side-to-side wheel wobble during rotation
- The tire edge that does not sit evenly on the rim
- Brake pads that touch the rim during wheel movement
- The tire is slowly losing air, especially with tubeless tires
- Visible dents or flat spots along the rim edge
Simple At-Home Rim Inspection Method
A quick inspection at home can confirm if the rim has a bend. This method needs no special tools and takes only a few minutes.
Follow these simple steps:
- Turn the bike upside down on a flat surface
- Spin the wheel slowly with your hand
- Use a fixed reference point like a brake pad or zip tie
- Watch the gap between the rim and the reference point
Tip: Wheel movement greater than 3-4 mm usually means the rim needs truing or repair.
Preventing Bent Mountain Bike Rims
Mountain bike rims often bend after strong impacts on rocky or uneven trails. Good riding habits and proper bike setup reduce this risk. A few simple steps help protect the rim and improve wheel durability.
Maintain Proper Tire Pressure
Correct tire pressure protects the rim during rough trail rides. Tubeless mountain bike tires usually work best around 22 to 30 PSI. Tires with tubes often require about 30 to 40 PSI. Low pressure increases the chance of rim strikes against rocks.
Choose the Right Riding Line
Trail choice affects wheel safety during mountain bike rides. Riders should avoid square-edge rocks that create sudden rim impacts. A small front wheel lift over obstacles reduces direct force on the rim and protects the wheel structure.
Upgrade to Stronger Rims
Stronger rims handle rough terrain better than basic wheel designs. Double-wall rims offer better strength and resist bending during heavy trail impacts. Wider trail rims and reinforced enduro rims also improve durability on aggressive mountain trails.
Reduce Hard Landings on Trails
Hard landings place strong pressure on the wheel rim during jumps or drops. Riders should land with bent arms and knees to absorb trail impact. Smooth landings reduce force on the rim and protect the wheel structure.
Check Wheels After Rough Rides
Regular wheel inspection helps detect small rim problems before they become serious damage. After rough rides, spin the wheel slowly and watch the rim edge. Early correction prevents larger bends and keeps the bike safe for future rides.
Also, check out our other blog if you are confused between a Mountain Bike vs Fat Bike.
Final Thought
Bent mountain bike rims often appear after rough rides over rocks, potholes, or sudden drops on trails. Many small rim bends respond well to spoke adjustment, careful dent correction, and simple wheel truing with basic tools.
A spoke wrench, steel ruler, or adjustable wrench can help restore proper wheel alignment and fix a bent mountain bike rim at home. However, a cracked rim or severe bend creates safety risks, so replacement remains the safest choice for reliable trail riding.