
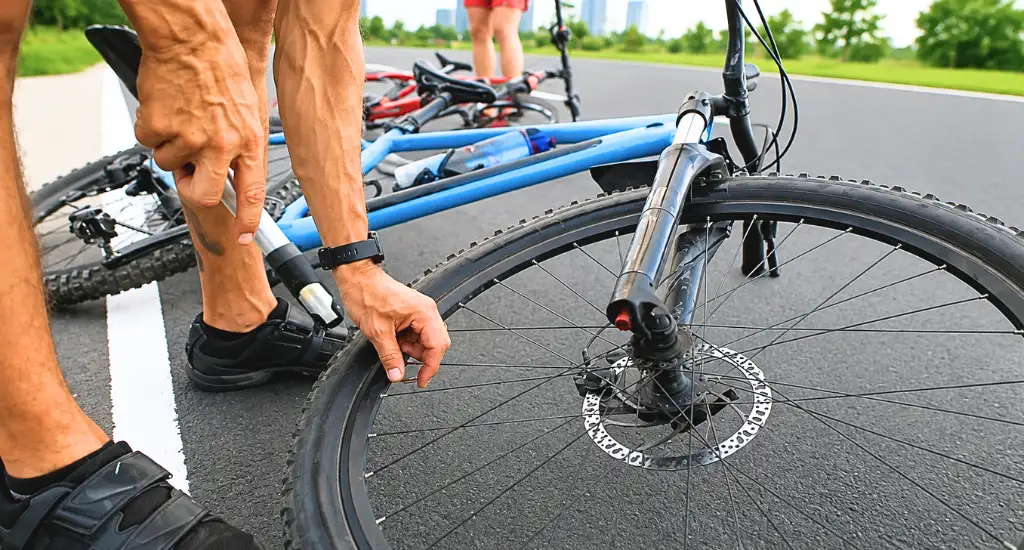
A popped bike tire is fixable in minutes once you know the right steps. To learn how to fix a popped bike tire, you remove the wheel, locate the puncture, then patch or swap the tube before you reinflate and ride again.
Most punctures come from road debris, sharp glass, or thorns that puncture the tube. Pinch flats happen when the tube gets caught between the tire and rim on a hard hit. Worn rubber and low pressure make tires more prone to sudden flats.
This guide walks through every step, starting with the tools you need and ending with correct reinflation. Follow along, and your bike will be ready to ride again in under twenty minutes.
What You Need to Fix a Popped Bike Tire
Fixing a popped tire requires a short list of tools you can carry in a small saddle bag. Most riders already own half of these items, and the rest cost very little at any bike shop.
- Tire Levers: Two or three plastic tire levers help you pry the tire bead off the rim without pinching the new tube. Metal levers work too, but they can scratch aluminum rims if you are not careful.
- Patch Kit: A patch kit contains rubber patches, sandpaper, and glue for sealing small holes in the tube. Self-adhesive patches skip the glue step and work well for quick trailside repairs.
- Spare Inner Tube: Carrying a spare tube saves time over patching, since you simply swap the damaged tube out and inflate the new one. Match the tube size and valve type to your wheel before you buy one.
- Pump or CO2 Inflator: A mini pump or CO2 inflator brings the tire back to riding pressure once the tube is replaced. CO2 cartridges inflate faster, but a pump never runs out of air.
- Valve Core Tool: This small tool lets you remove the valve core to deflate a tube fully or add sealant without pulling the tire apart.
- Gloves and a Rag: Keep your hands clean and get a better grip on the tire and rim during the repair. A rag also helps you wipe debris out of the tire casing.
How to Remove the Wheel and Tire
Remove the wheel with a few quick adjustments before you touch the tire itself. These steps keep the chain and brake out of the way so the removal goes smoothly, whether you are working on the road or in your garage. Gather your tools nearby so everything is within reach once you start.

Shift to the Smallest Gear
Shift the chain to the smallest rear cog before you remove the rear wheel. This keeps the chain slack and makes it far easier to slide the wheel back into the dropouts once the tube is replaced and the tire is reseated.
Release the Brake
Open the brake caliper or release the cable if you run rim brakes, since a fully inflated tire will not clear the pads. Disc brakes usually do not need this step, though you can still shift the rotor clear for extra room.
Detach the Wheel
Flip the quick-release lever or loosen the axle nuts with a wrench, then lift the wheel straight out of the frame or fork. Set the bike down on its side or use a repair stand so the drivetrain stays clean.
If the wheel wobbles side to side as you lift it out, you are likely dealing with fixing a buckled wheel rather than a simple flat, and that repair needs a truing stand instead of tire levers.
Deflate the Tire
Press the valve pin to release any remaining air, then unscrew the valve cap and core if your pump left pressure behind. Squeeze the tire sidewalls toward the center of the rim first, since this loosens the bead before you start prying.
Pry the Tire Off the Rim
Insert a tire lever under the bead near the valve, then hook the other end onto a spoke for leverage. Slide a second lever around the rim until one side of the tire pops free of the wheel. Work the lever around slowly rather than forcing it, since rushing can pinch or tear the tube underneath.
How to Find and Fix the Puncture
You locate a puncture by inspecting the tire and tube together rather than one at a time. Most causes fall into a few common categories, including sharp debris, thorns, and a worn casing that lets objects through.
Inspect the Tire Casing
Run your fingers slowly around the inside of the tire casing to feel for anything sharp still stuck inside. Small thorns, glass shards, and wire fragments often hide in the rubber and cause repeat flats if you miss them.

- Check the tread for embedded glass or metal
- Look for cuts or splits along the sidewall
- Feel for bumps that suggest a hidden object
- Note the puncture location to match it to the tube later
A hard impact that causes a flat can also knock the rim out of shape, so check for wobble or flat spots while the tire is off. Fixing a Bent mountain bike rim often gets caught at this stage, since a bent rim will not hold the tire bead evenly once you reinflate.
Check the Tube for Holes
Inflate the tube slightly and hold it close to your ear to listen for escaping air. Move it slowly past your face or a wet cheek, since you can often feel a faint hiss of air on your skin near the hole.
If you cannot hear or feel the leak, look for small cuts, snakebite marks from pinch flats, or a valve that has torn loose from the tube. Snake bites usually appear as two parallel slits close together on the tube.
Use the Water Test
Submerge the inflated tube section by section in a bucket of water and watch closely for a steady stream of rising bubbles. This method works well when a leak is too small to hear or feel by hand, especially on cold days.
- Inflate the tube fully before testing
- Rotate the tube slowly through the water
- Mark the leak location with a pen or chalk
- Dry the tube fully before you patch it
Patch the Hole
Roughen the area around the hole with sandpaper so the patch glue bonds properly to the rubber surface. Apply a thin layer of glue, let it turn tacky for a minute, then press the patch firmly in place and hold it under pressure.
- Sand the area around the hole
- Apply glue and let it dry until tacky
- Press the patch on and hold firm
- Wait several minutes before you reinflate
Replace the Tube Instead
A spare tube is faster to install than a patch, which matters most when you are short on time or dealing with a bigger tear. Push the valve through the rim first, then tuck the rest of the tube inside the tire before you seat the bead.
How to Reinstall the Tube and Reinflate
You reinstall the tire correctly by working slowly, which prevents pinches and keeps the tube from bulging out once it is inflated. If you rush this step, it often leads to another flat within a few miles, so give each stage a careful check before you move on.
Insert the Tube
Slightly inflate the tube so it holds its shape, then tuck the valve through the rim hole first. Tuck the rest of the tube inside the tire evenly around the wheel so it does not bunch up on one side. Avoid twisting the tube as you tuck it in, since a twisted tube can pinch when you reinflate.
Seat the Tire Bead
Push the tire bead back over the rim with your thumbs, starting opposite the valve and working toward it on both sides. Use a lever only for the last stretch, and check that the tube is not pinched underneath the bead.
Reattach the Wheel
Slide the wheel back into the dropouts and close the quick release or tighten the axle nuts firmly. Reconnect the brake caliper or cable, then spin the wheel to confirm it runs straight and clear of the frame.
Inflate to the Correct PSI
Inflate the tire in short bursts, checking the pressure against the number printed on the sidewall. Gravel setups, such as 28mm tires for gravel, usually run between 40 and 55 psi, while road tires sit higher and mountain tires sit lower.

Check the sidewall again after a few minutes, since pressure can settle slightly once the bead is fully seated.
End Note
A popped bike tire is a quick fix once you know the sequence: remove the wheel, locate the puncture, patch or swap the tube, then reinflate to the correct pressure. Keep a patch kit and spare tube in your saddle bag so you are never stuck far from home on any ride.
If you noticed a wobble or flat spot on the rim during the repair, that is a separate issue worth addressing before your next ride. So, this is how to fix a popped dirt bike tire at home.
FAQs
Is it safe to ride a bike with a popped tire?
It is not safe to ride a bike with a popped tire, since doing so damages the rim and reduces control. Stop and repair the flat before you continue, especially on wet roads or loose gravel.
How do you fix a popped tyre?
Remove the wheel, take out the tube, find the puncture, then patch or replace the tube before reinflating. Reattach the wheel and check the pressure before you ride again on the road or trail.
Can you ride on a popped bike tire?
You can push a bike short distances with a flat tire, but riding puts extra strain on the rim and can bend it. A short walk protects your wheel far better than riding it flat.
How much does it cost to fix a popped bike tire?
A patch kit costs a few dollars, while a new inner tube runs between five and fifteen dollars depending on size. Shop repairs typically add ten to twenty dollars in labor on top of parts.
How long does it take to fix a popped bike tire?
Most riders finish the repair in fifteen to twenty minutes once they have the right tools on hand. Patching takes slightly longer than swapping in a spare tube already inflated.


