
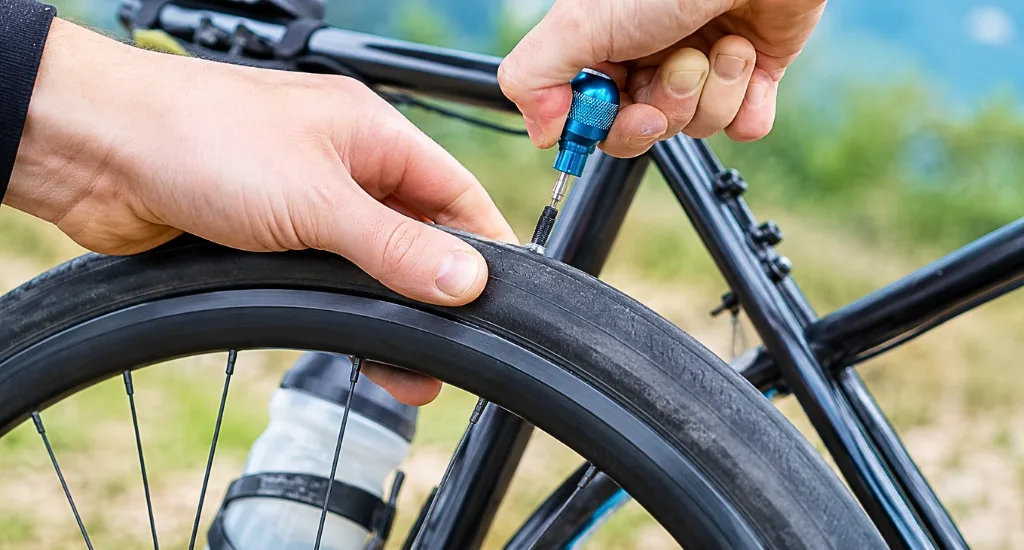
A flat mid-ride throws off your whole plan, especially when you thought tubeless tires solved that problem for good. Sealant blocks most small punctures before you even notice them, which is why tubeless riders see far fewer stops than tubed setups.
Data from Muc-Off’s puncture survey shows tubeless riders experience 79% fewer flats than tubed setups, but flats still happen on sharp rocks, thorns, or deep cuts. This guide covers three repair methods: self-seal, plug, and inner tube swap.
Keep reading, and you will know exactly how to fix a tubeless bike tire. Also, learn whether it happens on the trail or in your driveway.
Quick Answer
- Small puncture (under 2mm): rotate the wheel, let the sealant self-seal, then reinflate
- Medium puncture (2 to 6mm): use a tire plug kit, insert the plug, then reinflate
- Large cut or sidewall tear: install a spare inner tube with a tire boot
- Always carry a plug kit, CO2 cartridge or mini pump, and a spare tube
What You Need to Fix a Tubeless Bike Tire
A short list of tools covers nearly every tubeless repair, from a pinhole to a torn sidewall. Split your kit into trail essentials and a home workshop set so you are never caught without the right piece.
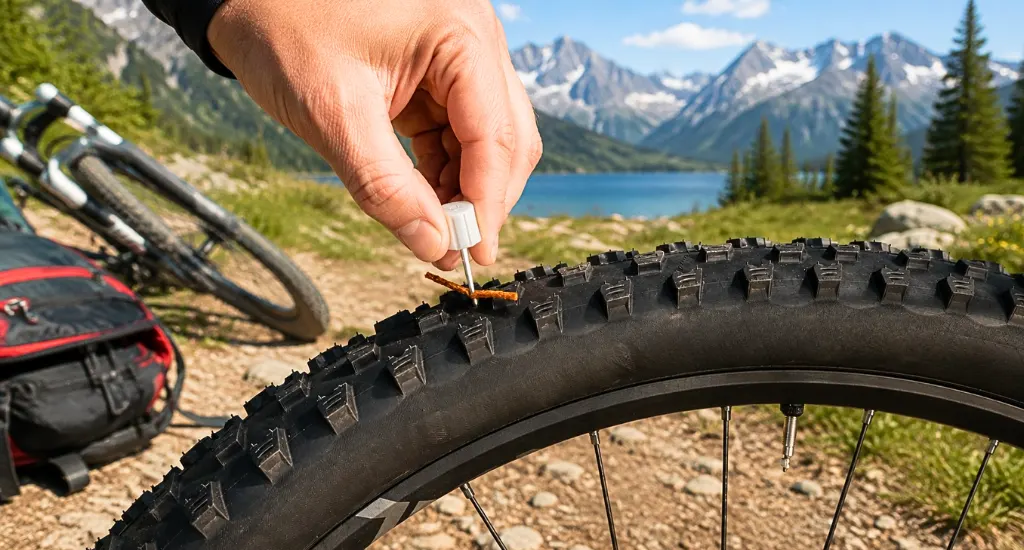
- Tire plug kit: rope-style plugs work for most trail punctures, while a Dynaplug-style tool inserts a sticky plug in seconds without removing the wheel
- CO2 cartridge or mini pump: CO2 reinflates fast but only works once per cartridge, while a mini pump takes longer and never runs dry
- Tire levers: plastic levers unseat the bead without scratching the rim
- Spare inner tube: your backup when a cut is too large for a plug
- Tire boot: covers larger gashes so the tube does not bulge through
- Sealant top-up bottle: refills sealant that dries out or leaks past a plug
How to Fix a Small Tubeless Tire Puncture
Sealant fixes most small holes on its own once you position the wheel correctly and give the latex time to work. Understanding how it seals helps you trust the process instead of panicking mid-ride.
How Sealant Works
Latex particles suspended in the sealant flow toward moving air, the moment a puncture opens a path for it to escape. Those particles clump together as they meet oxygen outside the tire, forming a soft, rubbery plug that seals the hole from the inside out.
Locate the Puncture
Look closely at the tread and sidewall for a fine spray or bubbling of sealant, which marks exactly where the air is escaping. A hissing sound also points you to the general area if the spray is hard to see in low light.
Rotate and Hold
Turn the wheel so the puncture faces straight down toward the ground, since gravity pulls sealant into the hole far faster than if it sits sideways or upward. Hold the wheel steady in that position for about thirty seconds while the seal forms.
Reinflate and Resume Riding
Check the pressure once the hissing stops completely, and top off with a pump or CO2 if the tire has lost noticeable air during the stop. This method handles holes up to roughly two millimeters, and continued riding afterward helps spread the sealant fully around the patched area.
How to Plug a Tubeless Bike Tire
Plugging is the fastest fix for medium punctures and works without removing the wheel from the bike at all. This method handles holes between two and six millimeters and often becomes a permanent repair.

Locate and Clear the Puncture
Listen for hissing air or watch for sealant bubbling up around the tread to find the exact hole. Remove any debris still lodged inside, such as glass, a thorn, or a nail, using the tool tip or a multitool before you insert anything.
Insert the Plug
Thread the plug into the insertion tool, centering it evenly along the shaft so it seats straight. Push the tool into the puncture firmly, using a slight corkscrew twisting motion to drive it deep, then insert until roughly two-thirds of the plug sits inside the tire.
Withdraw and Trim
Withdraw the tool carefully while bracing the tire firmly with your other hand, since pulling too fast can drag the plug back out with it. Trim any excess material sticking out, or leave it in place to wear down naturally over the next few rides.
Reinflate and Test the Seal
Reinflate with CO2 or a mini pump until you reach normal riding pressure. Check the seal by listening for leaks, feeling around the hole with your fingers, then riding slowly for thirty seconds before returning to full speed.
How to Fix a Large Tubeless Tire Cut
Sidewall slashes and deep gashes are too large for sealant or a plug to hold safely, so a spare tube becomes your emergency fix. This method gets you home even when the damage looks serious.

Remove the Wheel
Shift to the smallest cog first so the chain stays slack while the wheel comes out of the dropouts. If the chain keeps slipping or jumping instead of shifting cleanly onto that smallest cog, you may be dealing with chain skipping under load, which is worth adjusting once you are back home and off the trail.
Unseat the Bead and Remove the Valve
Deflate the tire completely, then use plastic tire levers to unseat one side of the bead, avoiding metal tools that can scratch the rim. Remove the tubeless valve stem from the rim and wipe any excess sealant from inside the tire with a rag.
Boot the Hole and Insert the Tube
Place a tire boot over the hole, using a folded dollar bill or an energy bar wrapper if you have no proper boot on hand. Insert the spare inner tube and tuck it evenly around the wheel so it does not bunch up on one side.
Reseat and Reinstall
Reseat the tire bead onto the rim, listening for a firm popping sound as it locks into place. Spin the wheel before reinstalling it and watch closely for side-to-side wobble, since a hard impact severe enough to cut the tire can also mean fixing a buckled wheel is the next job on your list. Reinstall the wheel and confirm the brakes clear the rim before riding again.
How to Permanently Repair a Tubeless Tire at Home
Trail patches get you home, but a lasting repair usually needs more time and the right materials at your bench. Home fixes handle bigger damage than a plug was never meant to solve.
Internal Patching
Clean the inside of the tire thoroughly, then rough up the area around the hole with sandpaper so the patch bonds properly to the rubber. Apply vulcanizing cement, press a tube patch firmly over the spot, and let it cure for a full 24 hours before remounting.
Sewing Larger Tears
Cuts between two and three inches long respond well to sewing rather than a patch alone. Clean the area, apply a thin layer of super glue along the tear, then sew it closed using dental floss and a curved needle before covering it with Shoe Goo.
Check the Brakes While the Wheel Is Off
With the wheel already out of the frame, spin it past the caliper and listen closely for rubbing or noise. This is a convenient moment to sort out a disk brake squeal fix if you have been putting one off, since the pads and rotor are fully exposed and easy to reach.
When to Replace the Tire
Multiple patches, a structurally damaged sidewall, or bead damage all signal it is time for a new tire rather than another repair. Riding on a tire that has failed structurally puts more strain on the wheel and increases your risk of a repeat flat.
End Note
Now, you must learn how to fix a tubeless bike tire. A tubeless flat rarely means the end of your ride once you know which method fits the damage. Sealant handles the small stuff, a plug covers most trail punctures, and a spare tube gets you home when the cut runs deep.
Carry a plug kit and a spare tube on every ride, and you will handle almost any tubeless flat without missing much saddle time.
FAQs
Can you put a tube in a tubeless bike tire?
Yes, this is the standard emergency fix for large cuts. Remove the tubeless valve first, then insert the tube and reseat the bead as usual.
Are tubeless tires harder to fix than regular tires?
No, plugging a tubeless tire is often faster than patching a tube. Most punctures seal without removing the wheel at all.
Can you patch a tubeless tire from the inside?
Yes, this works well at home. Clean the interior thoroughly and apply a vulcanizing tube patch over the cleaned area for a lasting seal.
How long do tubeless tire plugs last?
A properly installed plug is usually permanent. Many riders run the same plug for the entire life of the tire without issue.


