

A bike chain that slips, skips, or jumps under pressure can mean a lot of different things. It might be a brand-new chain fighting an old cassette. It might be a worn drivetrain that has quietly aged out. Or it might be something else entirely, like a stiff link or a bent derailleur hanger.
The good news is that most causes share the same short list of fixes, and you can usually find the real problem in a few minutes with no special tools beyond a chain checker and a spoke-sized Allen key or two.
This guide covers every common cause, from the quick five-minute fixes to the “when do I actually need new parts” decisions, plus what to do differently if the problem only shows up with a brand-new chain.
Key Takeaways
- A worn chain and worn cassette account for most chain slipping, especially under hard pedaling.
- A brand-new chain slipping on an old cassette is a mismatch problem, not a defective chain.
- Cable tension, dirt, stiff links, and a bent hanger cause the rest of the common cases.
- Replace the chain at 0.5% wear on 11 or 12-speed drivetrains, or 0.75% on 9 or 10-speed.
- If your pedals spin freely under hard effort but the chain stays put, that’s a freehub problem, not a chain problem.
Quick Diagnostic Checklist
Work through this table in order. Most cases resolve within the first three checks.
| Check | What to Look For | Quick Fix |
|---|---|---|
| Drivetrain cleanliness | Visible grime, dry chain, grinding noise | Clean with degreaser, apply chain lube |
| Cable tension | Chain hesitates or skips when shifting | Turn the barrel adjuster in quarter turns |
| Chain wear | Chain checker tool or ruler (12 inches should equal 24 rivets) | Replace at 0.5% (11-12 speed) or 0.75% (9-10 speed) |
| Cassette teeth | Pointed “shark fin” shapes instead of flat teeth | Replace the cassette; smallest cogs wear fastest |
| Stiff links | Chain jumps at the same spot every backpedal | Flex the link side to side by hand to loosen |
| Derailleur hanger | Jockey wheel not sitting directly below the cog | Straighten with an alignment tool, or replace |
| Chain length | Slack in small-small, or can’t reach big-big | Remove links if too long; replace if too short |
| Freehub | Pedals spin freely but the chain doesn’t engage under load | Have the freehub pawls or ratchet inspected |
Most Common Causes of Chain Slipping or Skipping
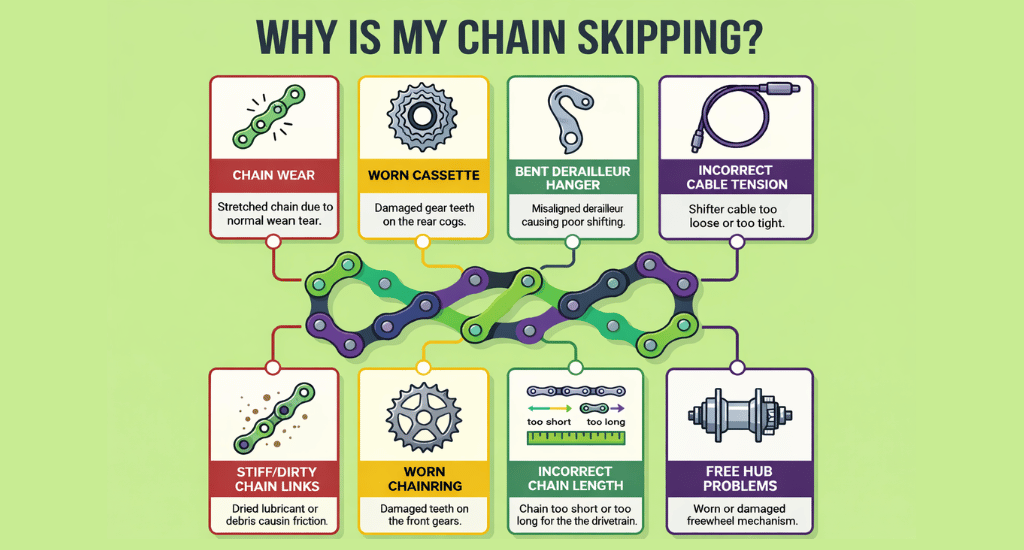
Work through these in order. The first two cover the large majority of cases.
1. Worn or Stretched Chain
A worn chain is the single most common cause. Chains don’t stretch like rubber. The pins and rollers inside each link wear down instead, which increases the distance between links, called pitch. Once the pitch grows enough, the chain can’t seat properly in the cassette teeth and slips under pressure.
Check it with a chain checker tool, or measure 24 rivets with a ruler. They should span exactly 12 inches. More than 1/16 inch over means it’s time to replace. A typical chain lasts 1,500 to 3,000 miles depending on riding conditions and how often you clean it.
2. Worn Cassette or Chainring Teeth
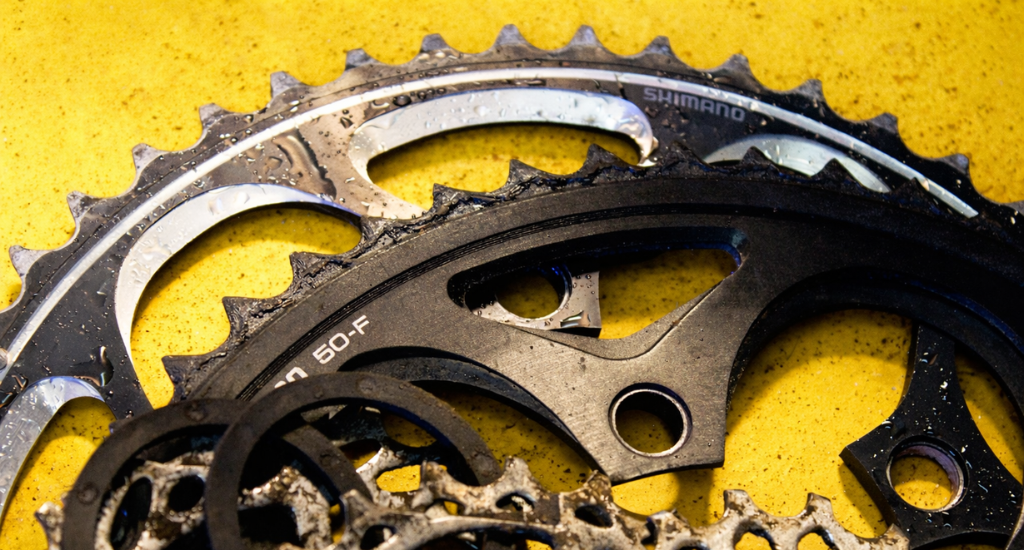
Worn cassette teeth develop a pointed “shark fin” shape instead of a flat profile. Deformed teeth like this can’t grip the chain well, especially under load. If your chain slips in one gear but shifts fine everywhere else, that specific cog is the worn one. The smallest cogs wear fastest since fewer teeth share the pedaling load.
Replace the cassette and replace the chain at the same time. Riders who replace the chain on schedule typically get 2 to 3 chains per cassette. Skipping chain replacement significantly shortens cassette life.
3. A New Chain on an Old Cassette
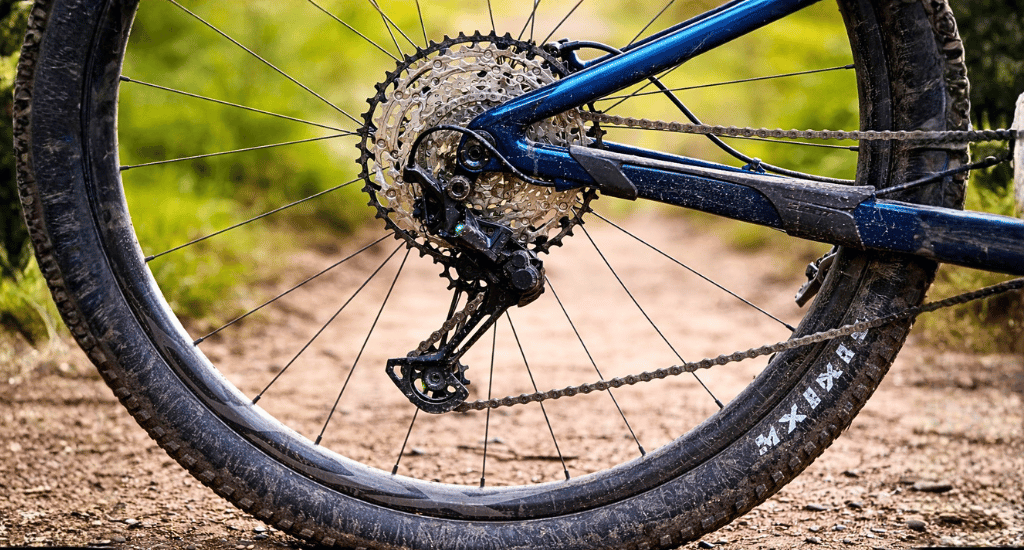
If you just installed a new chain and it’s slipping under hard pedaling, this is almost always a mismatch, not a defective chain. Your old chain stretched gradually over hundreds of miles, and the cassette teeth wore into a matching shape. A new chain has tighter link spacing that no longer fits those worn teeth. When you pedal hard, the chain rides up over the shark fin shape instead of seating into it, and it slips.
Minor slipping during the first 50 to 200 km on a new chain is normal bedding-in and usually settles as the surfaces mesh. Slipping that persists past 200 km, or that’s severe from day one, means the cassette needs to be replaced along with the chain.
4. Cable Tension and Derailleur Indexing
Stretched or loose cables prevent the derailleur from lining the chain up precisely over each cog. This shows up as hesitation when shifting, the chain jumping the wrong number of gears, or ghost shifting, where gears change on their own. Cable stretch happens naturally and is most common in the first few hundred miles on a new bike or after a new cable install.
Find the barrel adjuster where the cable meets the rear derailleur, or on the shifter itself. Turn it counter-clockwise in quarter turns to add tension, helping the chain shift more easily to larger cogs. Turn clockwise to reduce tension if it struggles to drop to smaller cogs. Test after every quarter turn. For a full walkthrough, see our guide on adjusting a mountain bike derailleur.
5. Dirty or Poorly Lubricated Drivetrain
A dry or dirty chain creates friction and poor tooth engagement. Dirt acts like a grinding paste inside the chain, accelerating wear. Clean with a bike-specific degreaser, let it dry fully, then apply chain lube to the inner plates where the pins sit rather than the outer surface. Wipe off the excess, since too much lube just attracts more dirt. Do this every 100 to 200 miles, or right after a wet or muddy ride.
6. Bent or Misaligned Derailleur Hanger
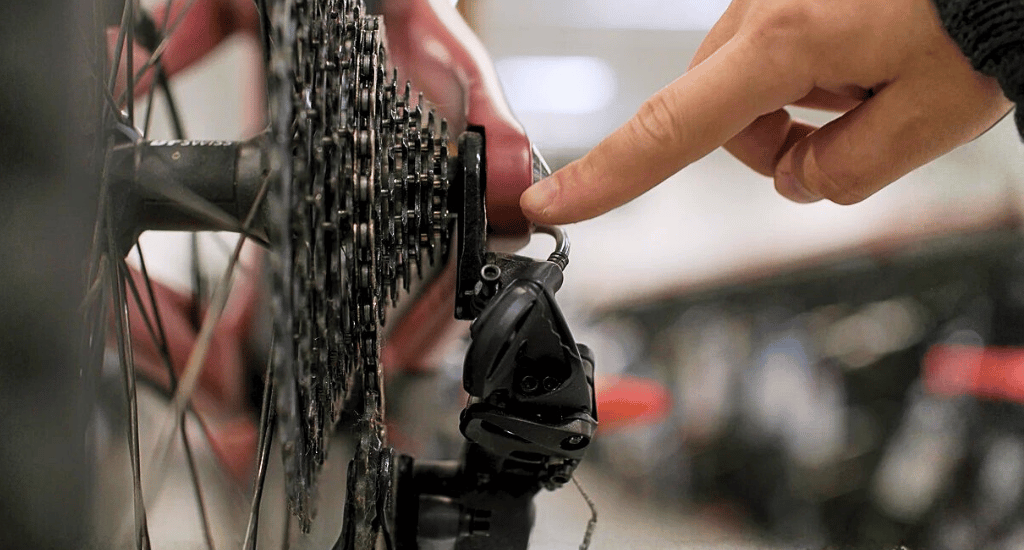
A bent hanger causes poor shifting across the whole gear range and persistent chain noise, since it pulls the chain sideways and keeps it from seating properly. This usually happens after a crash or a fall on the drive side.
Stand behind the bike and sight down the cassette. The jockey wheel should sit directly below whichever cog you’re in. Any visible angle means the hanger is bent. Minor bends can be corrected at home with an alignment tool. Badly bent hangers are cheap to replace and not worth repeatedly straightening.
7. Stiff or Damaged Chain Link
A stiff link causes the chain to skip once per pedal revolution, always at the same spot. This often comes from a poorly seated master link or damage from a crash. Backpedal slowly while watching the chain pass over the jockey wheels. A stiff link jumps as it bends through them. Grip the chain on either side of it and flex it side to side by hand to loosen. If it stays tight or looks damaged, replace that section with a chain tool and a fresh master link.
8. Incorrect Chain Length
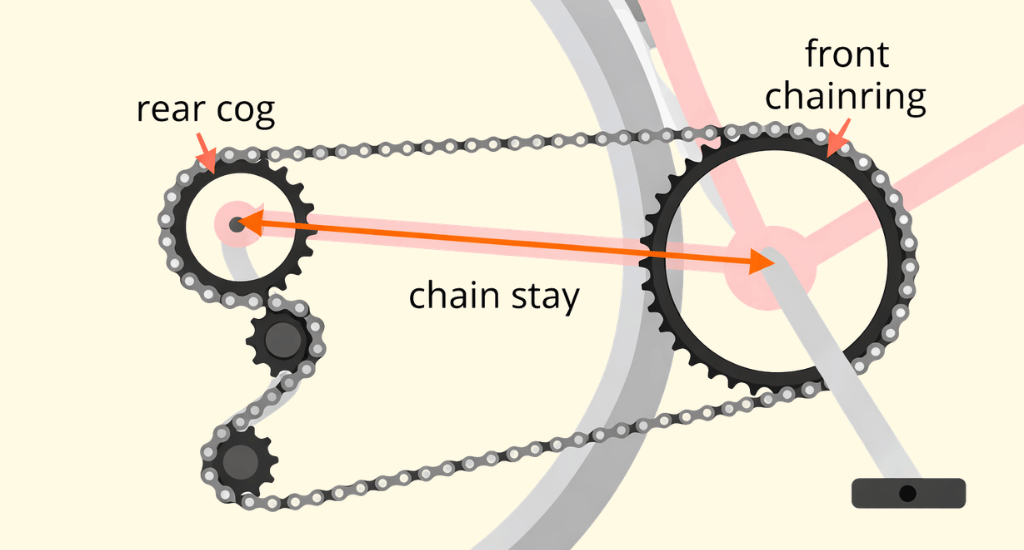
A chain that’s too long leaves slack in the smallest gears, and slack causes slipping under pressure. A chain that’s too short puts constant strain on the drivetrain and may not even reach the big-big gear combination. Shift to the largest chainring and largest rear cog to check. The rear derailleur cage should show a slight forward bend. Maxed out and straight means too short. Visible slack means too long. A chain length calculator makes it easy to confirm the right size.
9. Freehub or Ratchet Failure
If your pedals spin freely under hard effort but the chain itself stays engaged and doesn’t skip over teeth, the chain isn’t the problem. The freehub pawls or ratchet mechanism inside the rear hub, are worn and failing to grip. This shows up most on climbs, where torque is highest, which is why it’s easy to mistake for a chain issue. You can’t fix a freehub at home. Have it inspected and serviced at a shop. For the full breakdown of this specific case, including how it differs from a slipping chain step by step, see our guide on chain slipping when going uphill.
Installing a New Chain? Do This First
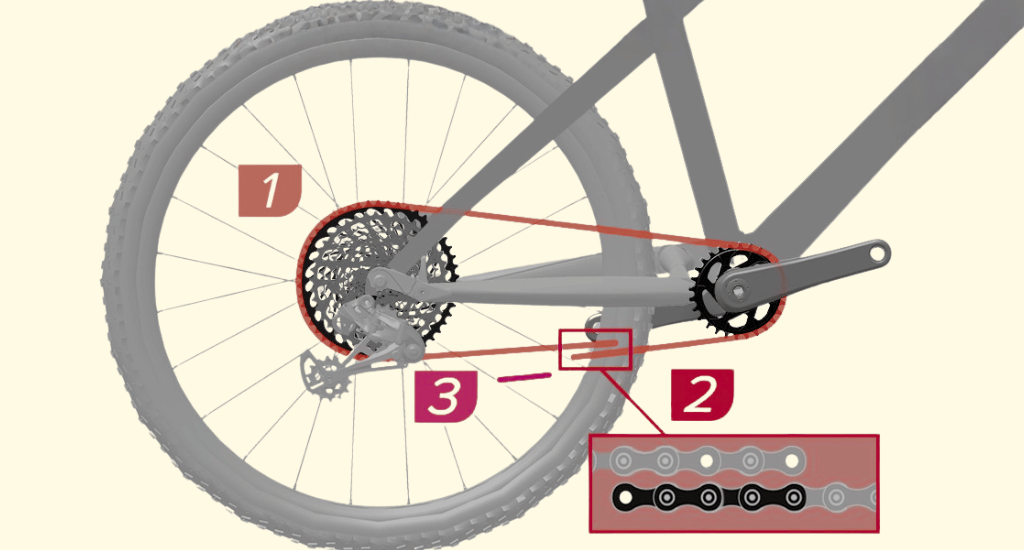
A few installation details prevent most new chain problems before they start.
- Match the new chain’s length to the old one, or wrap it around the largest cog and largest chainring and add two links.
- Route the chain correctly through the jockey wheels. It should pass behind the metal tab on the derailleur cage, not in front of it.
- Check that the master link’s plates click fully into place. A partially engaged link causes inconsistent tension and slipping that looks like a bigger problem than it is.
When to Replace the Chain and Cassette Together
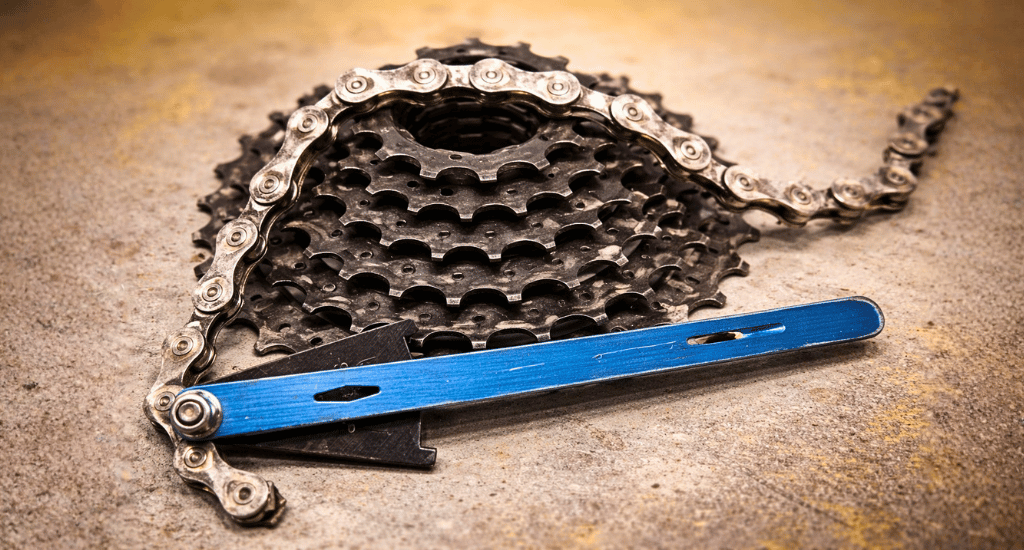
A chain checker tool takes the guesswork out of this decision.
Replace the Chain When
Wear hits 0.5% on 11 or 12-speed drivetrains, since these systems are narrow and wear faster. On 9 or 10 speed, replace at 0.75%. Never let it reach 1%, since the cassette is almost certainly damaged by that point, too.
Replace the Cassette When
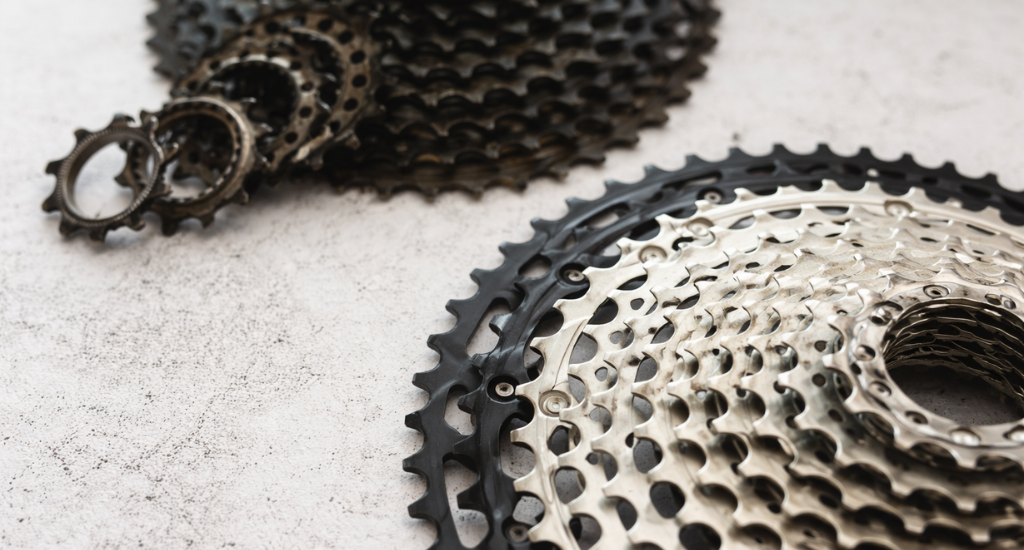
Install a fresh chain and test it under firm pedaling. If it skips, the cassette teeth are worn and won’t match a new chain’s pitch. Replace the cassette alongside the chain to restore proper grip. Budget $15 to $50 for a chain and $30 to $150 for a cassette, depending on speed and material. Replacing both together, rather than one at a time, keeps the whole drivetrain meshing correctly from the start.
Chain Keeps Falling Off? That’s a Different Problem
A chain that comes off entirely, rather than skipping while staying engaged, points to a different set of causes: misadjusted limit screws, a bent derailleur, worn chainring teeth, or a chain that’s too long.
The limit screws, marked H and L on the derailleur, set the physical boundaries that stop the chain from traveling past the smallest or largest cog. Turn the L screw clockwise if the chain falls inward toward the spokes. Turn the H screw clockwise if it falls outward toward the frame. If the chain keeps dropping off the front chainring specifically, check for worn shift ramps on the chainring teeth.
Why Skipping Happens More in Higher Gears
Higher gears use smaller rear cogs, and smaller cogs have fewer teeth holding the chain at any one time. When you press hard, all your force is concentrated on those few teeth, creating high pressure over a small contact area. If the chain or cassette is worn, those teeth can’t hold on, and the chain climbs over the worn edges instead of seating into them.
Lower gears use larger cogs with more teeth sharing the same load, so pressure spreads out and skipping shows up less. That’s also why skipping under hard effort, but not during light pedaling, usually points to a worn chain or cassette rather than a cable or indexing issue.
How to Prevent Chain Slipping
- Clean and lubricate every 100 to 200 miles, or right after wet or muddy rides.
- Check chain wear monthly with a chain checker tool, and replace before 0.75% wear.
- Avoid cross-chaining (big-big and small-small gear combinations put unnecessary strain on the drivetrain).
- Ease off the pedal pressure while shifting, especially on climbs.
- Schedule an annual tune-up for derailleur adjustment and cable inspection.
Bike setup matters here too. If your riding position puts extra strain on the drivetrain during climbs, our guide on adjusting mountain bike handlebars can help you find a more efficient position.
Final Thought
Most chain slipping comes down to a short list of causes: a worn chain, a worn cassette, loose cable tension, or a dirty drivetrain. Work through the diagnostic table at the top of this guide in order, and the first three checks will solve the majority of cases in well under fifteen minutes. When the problem only shows up on a brand-new chain, it’s almost always the old cassette underneath it that needs attention, not the new chain itself.
FAQs
Why does my bike chain keep slipping?
The most common causes are a worn chain, worn cassette teeth, or stretched shift cables. Check chain wear first with a chain checker tool, replacing at 0.5% wear for 11 or 12 speed chains. If the chain checks out fine, try adding cable tension with the barrel adjuster.
Is it normal for a new bike chain to slip at first?
A small amount of slipping during the first 50 to 200 km is normal bedding-in, as the new chain surfaces settle against the cassette teeth. Slipping that continues past that point, or that's severe from day one, usually means the cassette is worn and needs replacing too.
Can I install a new chain on a worn cassette?
It's not recommended. Worn cassette teeth develop a shark fin shape that won't match a new chain's tighter link spacing, which causes slipping under load. Replace the chain and cassette together for reliable results.
Can a dirty chain cause skipping?
Yes. Dirt blocks smooth link movement and prevents full contact with the gear teeth, and rust can stiffen a single link enough to cause a slip on every pedal turn. Cleaning and lubricating the chain often resolves this without any parts replacement.
Should I spray WD-40 on my bike chain?
No. Standard WD-40 is a solvent and degreaser, not a lubricant. It strips away existing lube and leaves the chain dry, which increases friction and speeds up wear. Use a bike-specific chain lubricant instead.
What are the symptoms of a bad derailleur hanger?
Look for chain slipping across multiple gears, poor shifting even after a cable adjustment, visible misalignment when you sight down the cassette from behind, or the chain falling off entirely. A bent hanger is the most common cause and can usually be straightened or replaced cheaply.
Why does my bike chain keep popping?
A popping sound usually points to a stiff link, a worn cassette cog, or general skipping under load. Backpedal slowly and watch the chain pass over the jockey wheels; a stiff link will visibly jump as it passes through.
Why does chain skipping happen more in higher gears?
Higher gears use smaller cogs with fewer teeth sharing the pedaling load, so more force runs through a smaller contact area. Worn teeth in that small area can't hold the chain, and it climbs over them instead of seating in. Lower gears spread the same load across more teeth, so skipping shows up less.


