Speed feels exciting until the bike refuses to stop. Adjusting mountain bike brakes keeps every ride safe, calm, and under control. Strong brakes help the bike slow fast and stay steady on dirt, rocks, and slopes.
Poor brake setup shows clear signs. The wheel may rub and slow the bike. The lever may pull too far. The bike may not stop on time. Each brake type works in its own way, so the fix also changes.
This guide explains brake setup in easy steps. It covers mechanical disc brakes, hydraulic disc brakes, and V-brakes. Read on to fix brake noise, weak stop power, and poor control.
How to Adjust Mountain Bike Brakes
Brake setup feels hard at first, but the steps stay simple. With calm moves and basic tools, anyone can tune bike brakes at home in a short time.
Step 1 – Identify Your Brake Type
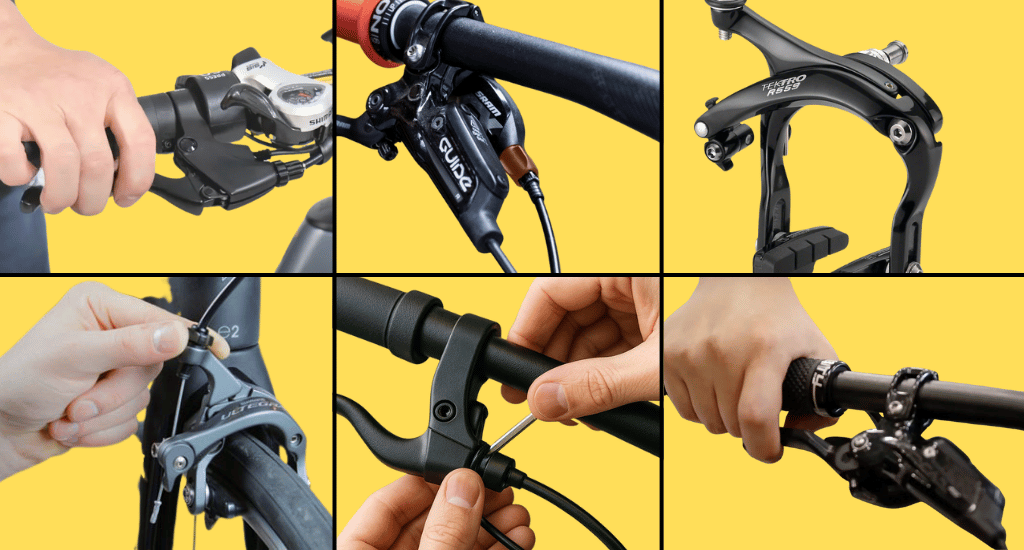
First, look at the brake system on your bike. Mechanical disc brakes use a steel cable to pull the brake pad. Hydraulic disc brakes use oil inside a hose to move the pads. V-brakes press rubber pads on the wheel rim.
This step matters because each system uses a different control point. Cable brakes rely on cable tension. Hydraulic brakes rely on piston position and lever reach. Wrong steps can cause noise or weak stopping power.
Step 2 – Prepare the Bike for Adjustment
Set the bike in a stand or turn it upside down so the wheels spin freely. Spin each wheel to check for smooth motion. Dirt can hide problems, so wipe the brake rotor or rim with a clean cloth. Most video guides show this step taking less than one minute.
A clean surface helps pads grip well and helps you hear rubbing sounds. Good prep saves time later and avoids false brake issues.
Step 3 – Center the Brake Caliper or Arms
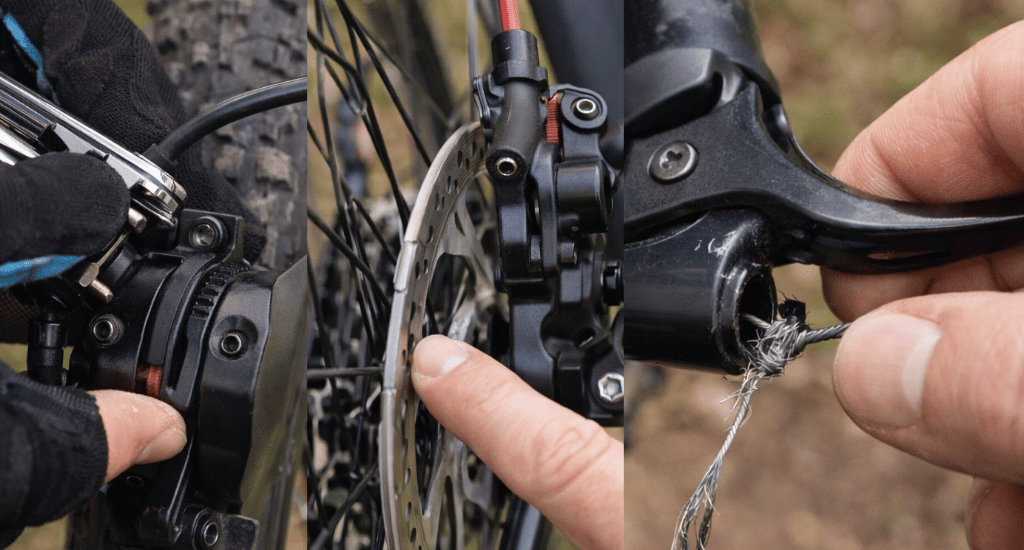
For disc brakes, loosen the two caliper bolts about half a turn. Pull the brake lever hard and hold it. While holding the lever, tighten the bolts again. Final torque should sit near 6 to 8 Nm.
This centers the caliper over the rotor. For V-brakes, check arm position on both sides of the rim. Use spring screws to balance them. Turn screws in small quarter turns for control.
Step 4 – Adjust Brake Pad Position
On disc brakes, move the inner pad with an Allen key. Leave a paper-thin gap so the rotor spins free. After the change, spin the wheel to confirm no rubbing sound appears. For V-brakes, line the pad flat on the rim surface.
Add a slight toe-in, so the front edge touches first. This small angle helps stop sharp noise and gives a smoother braking feel on trails.
Step 5 – Adjust Cable Tension or Lever Feel
Mechanical disc brakes and V-brakes use a barrel adjuster for fine changes. Turn it one quarter or half turn at a time. Use the cable pinch bolt if the lever pulls too far.
A good bite point comes before halfway lever travel. Hydraulic brakes use a reach dial or a small Allen key. Some models allow bite point change. Do not set the lever too close, or the pad drag may start.
Step 6 – Check for Brake Rubbing
Spin the wheel after each change. Watch the rotor or rim and listen closely. A light scrape sound means pad contact still exists.
Use small pad moves or a barrel adjuster turn to fix it. Take time here. Tiny changes make a big difference. A silent spin shows the brake sits in the right place and the wheel rolls without waste of speed.
Step 7 – Perform Final Safety Check
Do a short safety check before any ride. The wheel should spin freely without sound. Pads should move back evenly after lever release. The brake lever must stop short of the handlebars.
Take a slow test ride on flat ground. Test both brakes one at a time. This final step confirms the bike can stop with control and confidence before trail use
Brake-Type Specific Adjustment Notes
Each brake system reacts in its own way during setup. These short notes help you focus on the right areas, avoid common mistakes, and finish brake adjustment faster with better control.
Mechanical Disc Brake Adjustment Summary
Cable tension plays a key role in brake feel and power. The inner pad needs manual setup to sit close to the rotor. Most fixes take two to five minutes with basic tools.
Hydraulic Disc Brake Adjustment Summary
These brakes use self-moving pistons that adjust pad distance during use. Focus stays on caliper centering and lever reach setup. The pad position should stay slightly open to prevent drag and heat.
V-Brake Adjustment Summary
V-brakes depend on cable tension and equal spring force on both arms. The toe-in angle helps stop loud noise on braking. A Phillips screwdriver or 5mm Allen key handles most adjustments with ease.
Common Brake Problems and Quick Fixes
Brake trouble often starts small but grows fast if ignored. These simple fixes help restore safe control, smooth stopping, and quiet rides without stress or special skills.
Brakes Rubbing on the Wheel
Rubbing sounds mean the pads sit too close to the rotor or rim. Lift the wheel and spin it slowly. Watch where the pad touches. Recenter the caliper or move the pad slightly away. Make small changes and spin again. Stop once the wheel turns free and stays silent. This fix restores speed and keeps parts from wearing out early.
Weak or Slow Stopping Power
When the bike takes too long to stop, the brake system lacks grip. Loose cables or wide pad gaps cause this issue. Tighten the cable or move the pads closer to the braking surface. Clean the rotor or rim with a dry cloth. Dirt reduces grip fast. After this fix, the brake should bite sooner and feel firmer at the lever.
Brake Lever Pulls Too Far
A lever that comes close to the handle shows extra slack. Use the barrel adjuster to shorten lever travel. Turn it a little at a time. If the pull stays long, reset the cable at the pinch bolt. This change brings the bite point closer and helps the brake respond faster during sudden stops.
Loud Squeaking During Braking
Sharp noise during braking points to pad angle or dirty contact areas. Clean the rotor or rim first. On rim brakes, tilt the pad so the front edge touches first. This small angle reduces vibration. On disc brakes, check pad alignment. Quiet brakes feel smoother and help riders stay calm on busy paths.
Wrapping Up
Brake care feels small, yet it protects every ride. Adjusting mountain bike brakes improves stop power, balance, and rider trust on rough paths. A few calm checks keep pads aligned, levers firm, and wheels free from drag.
Check brake setup every two to four weeks, even if rides feel normal. Trail dust and cable stretch change brake feel over time. If braking feels uneven or strange after setup, a bike shop can help. Safe speed always starts with strong brakes