A bent derailleur can turn a fun mountain bike ride into a frustrating experience within minutes. This issue often appears after a crash, a rock strike, a hard drop, or careless bike transport on racks.
The good news is that most cases are simple to repair with basic checks. Many riders think the derailleur itself bends, yet the small hanger usually takes the damage first. This aluminum part sits between the frame and derailleur, and it bends to protect the frame.
A replacement hanger usually costs about $10 to $35 on most mountain bikes. Well, in this guide, you will learn how to fix a bent derailleur step by step with clear methods that beginners can follow.
How to Fix a Bent Derailleur on a Mountain Bike
A bent derailleur can make gear shifts rough and noisy during a normal trail ride. The repair process is not complicated if the cause becomes clear first. This section explains how to fix a bent derailleur through simple checks and careful adjustment steps that most mountain bike riders can follow at home.
Step 1: Determine If the Derailleur or the Hanger Is Bent
The first task involves a simple inspection that shows where the real problem sits. Gear trouble does not always come from the derailleur itself. A bent hanger often creates the same symptoms on many mountain bikes.
You may notice that some gears shift smoothly while others skip during pedaling. The chain may rub against nearby parts in certain gears. The rear derailleur can also appear slightly tilted toward the wheel or leaning outward.
Visual Alignment Check
Stand a few steps behind the bike and look straight toward the cassette. The derailleur cage should sit in a straight vertical line with the cassette cogs. Any visible lean usually points to a bent hanger.
A straight cage should match the cassette direction almost perfectly when the bike rests on level ground. Even a small angle difference may cause poor shifting across several gears.
Wheel-Thread Test
This simple trick helps confirm hanger alignment with basic tools found on most bikes. Start by removing the derailleur mounting bolt while the shift cable stays connected to the derailleur.
After removal, thread a quick-release rear wheel axle into the hanger hole carefully. Turn the wheel slowly and compare the alignment against the cassette and frame. The wheel works like a long lever that helps reveal small bending.
Step 2: Straighten a Bent Rear Derailleur Hanger With an Alignment Tool
A derailleur hanger alignment tool gives the most precise result during repair. Bike shops rely on this tool because it measures the hanger position with accuracy against the rear wheel rim.
What Is a Derailleur Hanger Alignment Tool
This tool threads directly into the derailleur hanger in place of the derailleur bolt. The long arm reaches toward the wheel rim and shows alignment differences around the wheel.
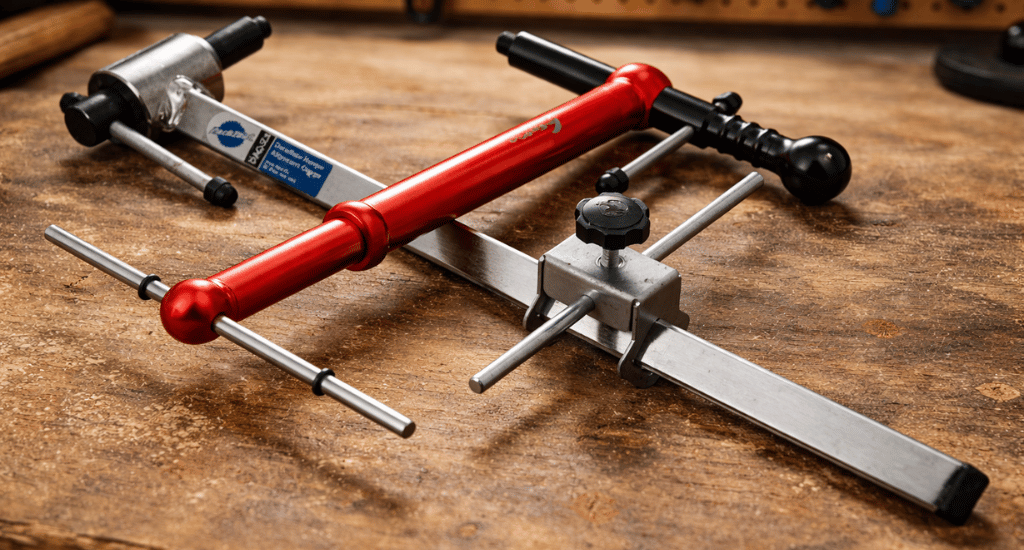
Many mechanics use tools like Park Tool DAG-2.2 or Abbey HAG for this work. A correct hanger position usually stays within about 2 to 4 millimeters from the rim across measurement points.
How to Use the Alignment Tool
Start the process by removing the rear derailleur from the hanger carefully. Thread the alignment tool into the hanger until it sits firm and straight.
Rotate the tool to the 12, 3, 6, and 9 o’clock wheel positions. Measure the distance between the tool tip and rim at each point. Apply gentle pressure on the tool arm until the distances match closely.
Step 3: Straighten a Bent Rear Mech Trailside (Emergency Fix)
A trail repair can help when gear problems appear far away from home or a workshop. This quick method does not require special tools and may restore usable shifting for the rest of the ride.
Fix Without Removing the Derailleur
Shift the chain onto the smallest rear cog before any adjustment begins. This position gives more space between the derailleur and the wheel spokes.
Use careful pressure on the derailleur body and move it slightly inward or outward. Test the gears after each adjustment to see if shifting improves across the cassette.
Remove the Derailleur for Better Leverage
Better leverage helps when the hanger bend feels slightly stronger than normal. You should remove the derailleur mounting bolt while the cable stays connected.
After removal, use the hanger hole as a leverage point with a suitable tool or axle. Gentle pressure often moves the hanger closer to the correct alignment.
Step 4: Fix a Bent Derailleur Hanger Without a Special Tool
Home repair methods can help when a hanger tool is not available. These techniques require patience and slow adjustments to avoid damage to the soft aluminum hanger.
Rear Wheel Axle Trick
A quick-release axle or spare wheel can act as a long lever for alignment checks. Thread the axle carefully into the hanger where the derailleur normally mounts.
Use the wheel as a handle and apply light pressure toward the correct direction. Compare the derailleur position with the cassette during each adjustment step.
Adjustable Wrench Method
An adjustable wrench can grip the hanger edge during minor alignment work. Place the wrench gently on the hanger and keep the grip firm but controlled.
Apply slow pressure until the hanger moves slightly toward the straight position. Sudden force may snap the aluminum hanger, which then requires full replacement.
Step 5: Reinstall the Derailleur and Test Shifting
The final stage checks whether the repair restored smooth gear changes across the cassette. Careful setup after the hanger adjustment ensures proper derailleur movement.
You should attach the derailleur back onto the hanger with the mounting bolt tightened securely. Inspect the limit screws and confirm correct chain travel on the cassette.
Adjust the barrel adjuster to fine-tune cable tension for cleaner shifts. Most mountain bike cassettes include about ten to twelve gears, so smooth shifting should appear across every gear. Read this blog to adjust a bicycle derailleur correctly every time.
How to Tell If the Derailleur Itself Is Bent (Not Just the Hanger)
A bent hanger causes many shifting issues on mountain bikes, yet the derailleur itself may also bend after a crash or heavy impact. This section helps confirm the true damage before repair attempts.
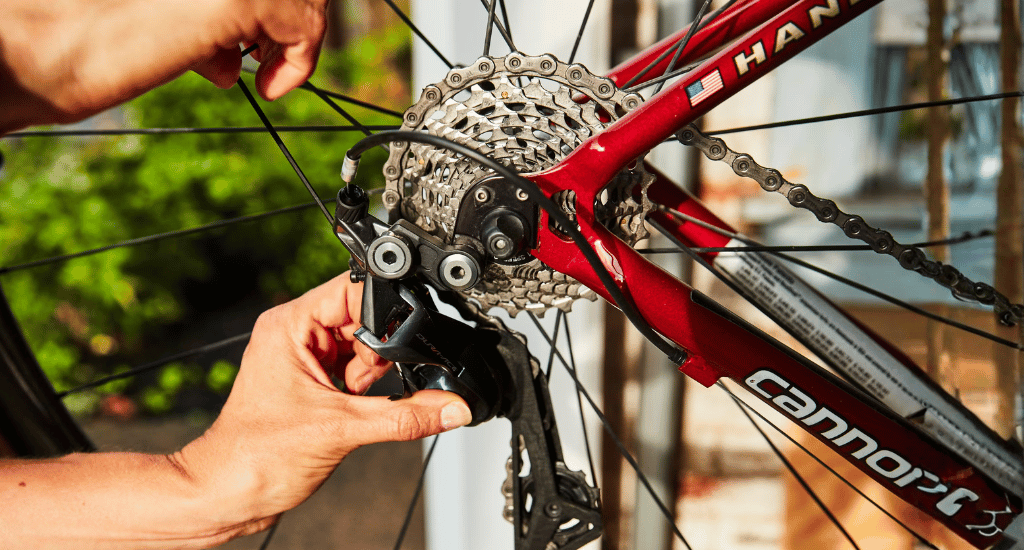
Common Signs of a Bent Rear Derailleur
A close look at the derailleur can reveal damage that affects gear performance. The derailleur cage and pulley wheels should form a straight vertical line behind the cassette during a normal inspection.
Signs that suggest a bent derailleur include:
- The pulley cage appears twisted instead of following a straight vertical path beside the cassette.
- Jockey wheels fail to align vertically, which may disturb chain movement across the gears.
- The chain rubs against the derailleur cage, which creates a light scraping sound during pedaling.
When a Derailleur Cannot Be Fixed
Some derailleur damage cannot return to its proper shape with careful adjustment. A strong crash or heavy rock strike may deform internal parts, which reduces shift accuracy and makes repair unsafe.
Situations where replacement becomes the better choice include:
- Cracked derailleur body, which weakens the structure and risks sudden failure during riding.
- Severely twisted cage, where straight alignment cannot be restored with safe pressure.
- Bent pivot joints, which affect the derailleur movement across cassette gears.
Cost of Fixing a Bent Derailleur
A bent derailleur problem does not always require expensive repairs. The final cost depends on tools, damaged parts, and the repair method. Many riders choose home repair, while others prefer a quick visit to a bike shop for adjustment.
DIY Cost
Many mountain bike owners repair minor derailleur problems at home with simple tools. The total cost often stays low because most bikes use a small replaceable hanger that protects the frame during impacts.
Common DIY repair costs include:
- Derailleur hanger alignment tool: About $70-$120 for a quality tool used in many repairs.
- Replacement derailleur hanger: Usually $10-$35, depending on the bike brand and frame design.
A hanger replacement often solves the problem after a crash or a strong rock strike. It makes fixing a bent derailleur hanger one of the most affordable mountain bike repairs.
Bike Shop Cost
Some riders prefer professional repair because mechanics have precise alignment tools and adjustment experience. A quick shop visit can restore smooth shifting and prevent further drivetrain problems.
Typical bike shop service prices include:
- Derailleur hanger alignment service: Around $15-$30 in most repair shops.
- Full drivetrain tuning: Usually $40-$80, which includes gear adjustment and shifting checks.
A shop repair can save time and ensure the derailleur system works smoothly across every cassette gear.
Final Thought
Most shifting trouble after a crash comes from a bent hanger instead of the derailleur itself. A quick inspection helps confirm the issue early. This guide explained how to fix a bent rear derailleur through careful checks and simple alignment methods.
You should start with a clear alignment check, then straighten the hanger with a tool or wheel axle. Replace the hanger if the damage looks severe. Fast repair protects the drivetrain and keeps gear shifts smooth on every ride.