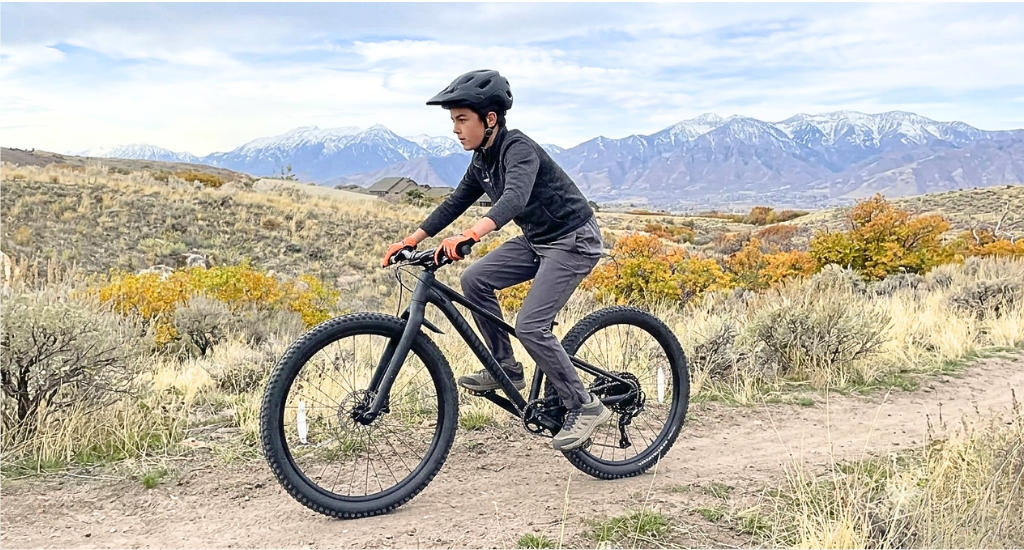
A mountain bike can feel like a wild horse if the shocks are wrong, even on easy trails. How to adjust mountain bike shocks matters for comfort, control, and real performance. The right setup keeps the wheels stable and helps the body feel less tired after long rides.
Poor shock setup brings clear problems. A harsh ride sends stress to arms and legs. Bottoming out causes hard hits on drops and roots. Loss of traction makes turns feel unsafe and climbs more difficult.
This blog gives a simple step-by-step guide. You will learn how to adjust front and rear shocks with ease. Read this blog and set up your bike for smooth and confident rides.
How to Adjust Mountain Bike Shocks (Step-by-Step)
Good shock setup changes how a bike feels on the trail. A proper setup improves comfort, control, and safety. This guide explains how to adjust mountain bike shocks in clear steps that any rider can follow without stress.
Step 1: Identify Your Shock Type
Air shocks use air pressure to support body weight. Coil shocks use a metal spring for support. Air shocks feel lighter and allow easy setup. Coil shocks feel softer on rough trails and suit aggressive riding styles.
Front suspension is the fork, which controls steering and braking feel. Rear suspension is the rear shock, which controls balance and traction. Both need setup, but the controls are not always the same.
Adjustment points differ because air shocks depend on pressure, while coil shocks depend on spring size. Forks often have more dials. Rear shocks usually have fewer, but still need careful setup.
Step 2: Set the Correct Sag
Sag means how much the shock moves when the rider sits on the bike. Sag helps the tires stay in contact with the ground. Without correct sag, the bike feels either too stiff or too soft.
Trail riding needs about 25 to 30 percent sag. XC riding needs about 20 to 25 percent. Enduro riding works best with about 30 to 35 percent sag for better grip.
To measure sag, wear riding gear and sit on the bike. Use a wall for support. Check the rubber ring or measure with a ruler to see how much the shock compresses.
Step 3: Adjust Air Pressure or Spring Rate
Rider weight gives the base value for air pressure. Most shocks show a PSI guide on the body. This helps set a safe starting point before fine-tuning.
Use a shock pump for air shocks. Add air if the bike feels too soft. Release air if the bike feels too firm. Small changes give better results than large jumps.
For coil shocks, spring rate matters more than air. Heavier riders need a harder spring. Lighter riders need a softer spring. The wrong spring size makes a good setup impossible.
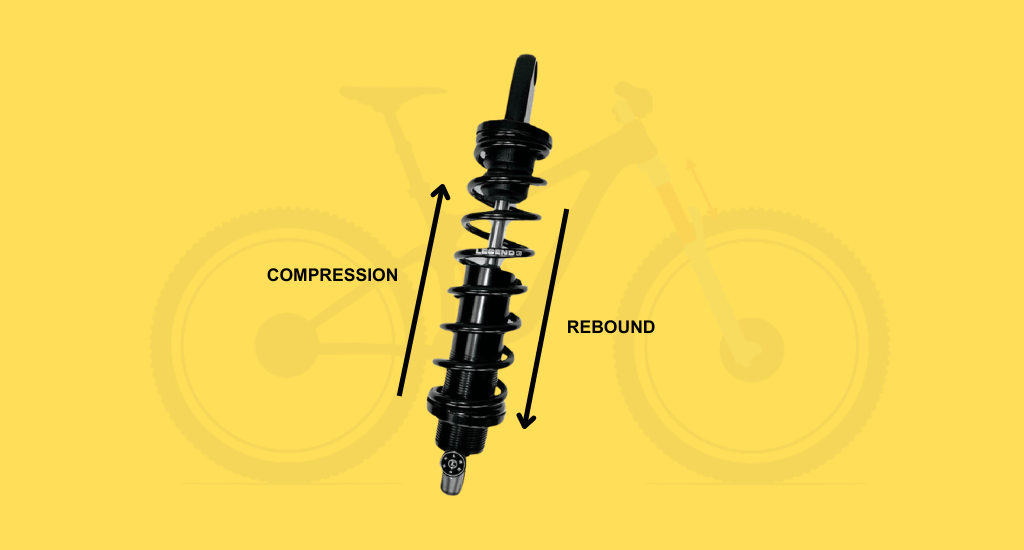
Step 4: Dial in Rebound Damping
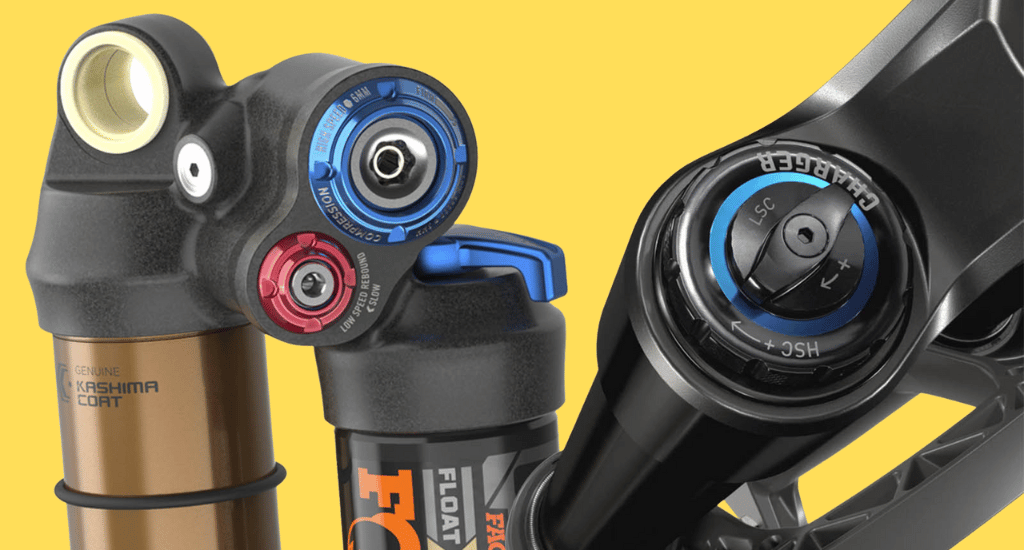
Rebound controls how fast the shock returns after a bump. This setting affects how stable the bike feels on rough ground. A good rebound keeps the bike calm and steady.
Too fast a rebound makes the bike bounce and lose grip. Too slow a rebound makes the bike feel heavy and stuck. Both reduce control on technical trails.
Use the rebound dial and turn one click at a time. Ride after each change. The bike should feel smooth without sudden jumps.
Step 5: Adjust Compression Damping
Compression controls how the shock reacts when it hits bumps. Low-speed compression affects pedaling and body movement. High-speed compression affects rocks, roots, and drops.
Increase compression if the bike dives too much under braking. Decrease compression if the ride feels harsh and stiff.
Test on the same trail section. Ride at normal speed. Pay attention to comfort and control more than numbers.
Step 6: Test Ride and Fine-Tune
Use a short trail loop with turns, climbs, and small drops. This shows how the bike performs in real conditions.
Change only one setting at a time. This helps identify what improves the ride and what does not. Keep simple notes about PSI, clicks, and trail feel. This makes future setup faster and easier.
Gear Needed to Adjust Mountain Bike Shocks
Basic tools make shock setup simple and accurate. A shock pump sets the correct air pressure. A ruler helps measure sag. A notebook tracks settings. Riding gear ensures real weight stays correct during setup.
- Traction and grip: Proper shocks keep tires planted on rough and loose surfaces.
- Rolling resistance: Correct pressure helps the bike roll more smoothly with less energy loss.
- Comfort and vibration damping: A good setup reduces arm, leg, and lower back fatigue.
- Bike handling and stability: Balanced shocks improve control during turns, climbs, and descents.
Common Shock Setup Mistakes to Avoid
Small setup mistakes can ruin an entire ride. Many riders blame the trail or the bike, but the real issue often comes from poor shock setup that affects comfort, control, and overall confidence.
Running Too Little or Too Much Sag
Running too little sag makes the bike feel stiff and uncomfortable on rough trails. The tires lose contact with the ground on small bumps, which reduces grip and increases body fatigue.
Running too much sag makes the bike sink too deep and feel slow. This often causes bottoming out on drops, roots, and rocks. Both situations reduce control and make the ride feel unsafe, even on familiar trails.
Over-Adjusting Rebound or Compression
Over-adjusting rebound or compression creates confusion instead of improvement. Large changes at once make it hard to notice what truly helps. Fast rebound causes bouncing and poor traction.
Slow rebound makes the bike feel heavy and stuck. The same problem appears with compression. Too much makes the ride harsh. Too little makes the bike dive and feel unstable during braking.
Ignoring Manufacturer Recommendations
Ignoring manufacturer recommendations places the rider far from a proper starting point. Shock brands test their products on different rider weights and trail types. Their guides give safe base values for air pressure and damping.
Skipping these values forces blind adjustments and wastes time. Many riders struggle simply because they never begin from a balanced setup.
Not Adjusting for Riding Style or Terrain
Not adjusting shocks for riding style or terrain limits real bike performance. Smooth trails need firmer setup than rocky trails. XC riding needs different settings than enduro riding.
Rider weight, speed, and confidence level also matter. A single setup cannot suit every condition. Good setup always changes with how and where the bike is ridden.
When to Re-Adjust Your Mountain Bike Shocks
Shock setup does not stay perfect forever. Changes in body weight, trail type, or weather can affect how the bike feels. Re-adjusting at the right time keeps the ride smooth, safe, and easy to control.
After Weight Changes or Gear Upgrades
Body weight plays a direct role in shock performance. Even small weight changes can affect sag and balance. New gear, like a backpack, water pack, or protective armor, also adds extra load.
This extra weight changes how much the shock compresses. Without adjustment, the bike may feel soft or unstable. A quick sag check helps restore proper support and comfort.
Switching Riding Styles or Terrain
Different riding styles need different shock setups. Smooth XC trails need firmer settings for better speed. Rocky enduro trails need softer settings for better grip.
A bike set for park riding may feel harsh on flat trails. Trail type affects how often the shock moves and how hard it works. Re-adjustment helps match the bike to real trail demands.
Seasonal Temperature Changes
Air pressure changes with temperature. Cold air reduces pressure. Hot air increases pressure. This directly affects air shocks. A bike set in summer may feel soft in winter.
A bike set in winter may feel harsh in summer. Checking PSI during season changes keeps sag, and the ride feels consistent throughout the year.
Signs Your Current Setup Isn’t Working
Clear signs show when the setup feels wrong. Frequent bottoming out means too soft. Harsh vibration means too firm. Poor traction in corners signals rebound or compression issues.
Body pain after short rides also suggests a bad setup. These signals mean the bike needs fresh adjustment before trail performance suffers.
Conclusion
Proper shock adjustment plays a major role in how a mountain bike feels on every trail. A good setup improves comfort, control, and safety. It also helps the bike handle bumps better and keeps the rider fresh during long rides.
Always start with sag before touching other settings. Then adjust rebound and compression in small steps. Test on real trails and make simple changes over time. As skills grow, the setup should change too. A well-tuned shock setup truly transforms ride quality.