A new bike chain slipping when pedaling hard is almost always caused by a worn cassette. The old chain stretched over time, reshaping the cassette teeth. Now your new chain can’t grip those worn teeth under load.
The good news is that most fixes take minutes and need no special tools. This guide walks you through step-by-step repairs, starting with the quickest adjustments. You’ll also learn why this happens and how to prevent it from recurring.
How to Fix a New Bike Chain That Keeps Slipping
Start with the simplest adjustments before replacing any parts. Most new chain slipping issues resolve with basic tuning that takes just a few minutes.
1. Adjust Cable Tension With the Barrel Adjuster
The barrel adjuster controls cable tension and instantly fixes most shifting problems. You’ll find it where the cable enters the rear derailleur or on the shifter itself.
Turn the barrel adjuster counter-clockwise to add tension. This helps the chain shift smoothly to larger cogs. Turn it clockwise to reduce tension if the chain struggles to drop to smaller cogs.
Make half-turn increments only. Test the shifting after each adjustment by pedaling and clicking through the gears. Your goal is one click, producing one clean gear shift with no hesitation or skipping. For a complete walkthrough on fine-tuning your shifting system, read our guide on adjusting a mountain bike derailleur correctly.
2. Check and Fix a Stiff Link
A stiff link causes the chain to skip once every pedal revolution in a rhythmic pattern. New chains sometimes have stiff links from manufacturing or improper installation of the master link.
To diagnose, pedal backward slowly while watching the derailleur cage. A stiff link creates jerky movement as it passes through the pulleys.
Fix it by gripping the chain on either side of the stiff link. Flex the chain side to side several times until the link moves freely. Test by pedaling backward again. The derailleur cage should now move smoothly.
3. Verify Chain Length and Routing
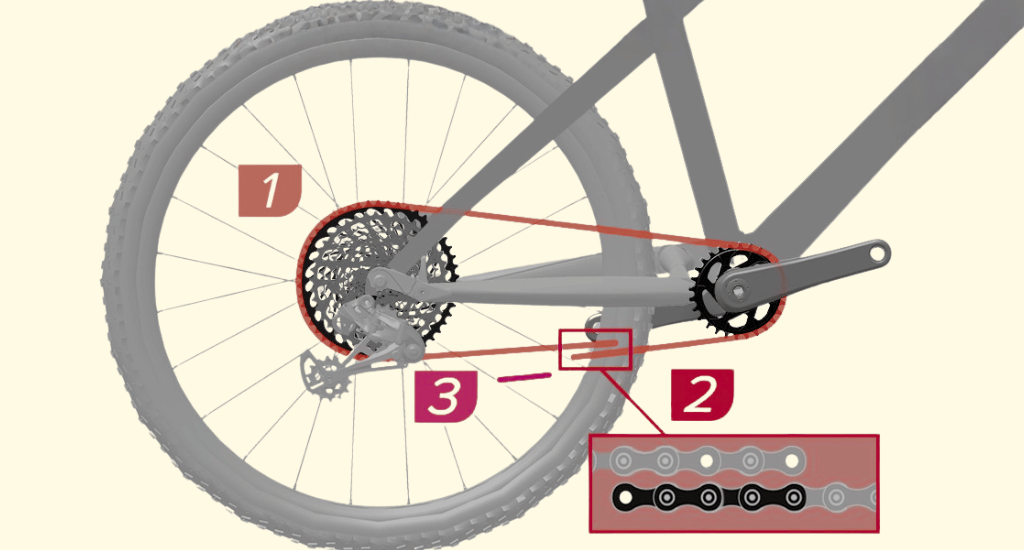
A chain with too many links lacks proper tension and slips under load. Match your new chain length to the old chain, or use this method: wrap the chain around the largest cog and largest chainring, then add two links.
Check that the chain routes correctly through the jockey wheels. It should pass behind the metal tab on the derailleur cage, not in front of it.
Inspect the master link or quick link. Both plates must click fully into place. A partially engaged quick link causes inconsistent tension and slipping.
4. Replace the Worn Cassette
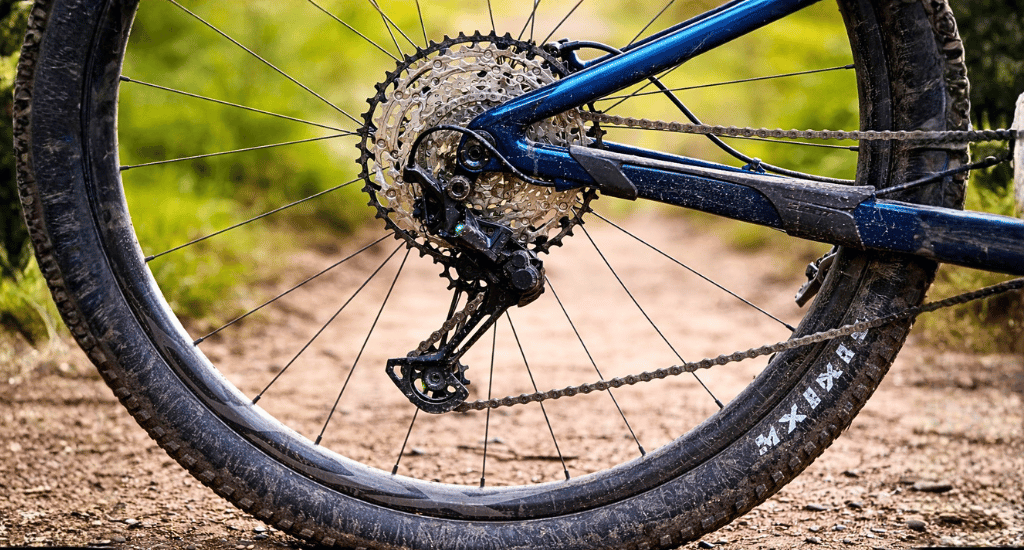
A worn cassette is the most common reason a new chain slips when previous fixes fail. Worn cassette teeth develop a “shark fin” shape that cannot grip & new chain links skip under heavy pedaling load.
You need two tools for replacement: a chain whip to hold the cassette steady and a cassette lockring tool to unthread the locking. Both are inexpensive and reusable.
Replace with a cassette that matches your drivetrain speed (8-, 9-, 10-, 11-, or 12-speed). Check the front chainrings for similar wear patterns while the chain is off.
Best practice for heavily worn drivetrains is replacing the chain, cassette, and chainrings together. This ensures all components mesh properly from the start. Unsure which drivetrain setup is right for you? Our 1x vs 2x mountain bike comparison breaks down the differences
5. How to Tighten a New Bike Chain
Proper chain tension means slight deflection when pressed, with no visible slack hanging from the chainring.
For single-speed or fixed gear bikes, loosen the rear axle nuts and slide the wheel backward in the dropouts until tension is correct. Retighten the axle nuts evenly on both sides. Not sure which bike type suits you? Compare options in our mountain bike vs fixie guide.
For derailleur bikes, remove excess links using a chain tool. Push out the connecting pin, remove the extra links, and rejoin the chain.
Avoid over-tightening. A chain that’s too tight strains the drivetrain, accelerates wear, and makes pedaling feel stiff.
Why Does a New Bike Chain Slip When Pedaling Hard?
Understanding the causes helps you diagnose faster and avoid repeat problems. Here’s why new chains slip under load.
A. Worn Cassette Not Meshing With New Chain
A worn cassette is the number one cause of a new bike chain slipping when pedaling hard. This happens because your old chain stretched gradually over hundreds of miles, reshaping the cassette teeth as it wore.
Cassette teeth on heavily used cogs develop a hooked “shark fin” profile. These worn teeth matched your old, stretched chain perfectly. But a new chain has tighter link spacing, called pitch, that no longer fits the worn tooth profile.
When you pedal hard, the chain rides up on these shark fin teeth instead of seating into the valleys. The increased force pulls the chain over the top, causing it to slip. You’ll notice slipping is worst on your most frequently used cogs since those teeth are the most worn.
B. Derailleur Needs Indexing Adjustment
A new chain can throw off your derailleur’s gear indexing. The slightly different chain length changes how the drivetrain sits, requiring a re-tune of cable tension.
Cable stretch is another common culprit, especially on new bikes or after a recent cable replacement. Cables stretch most during their first few weeks of use.
Symptoms include hesitation when shifting or the chain jumping multiple gears with one click. Both indicate the derailleur isn’t moving the correct distance between cogs.
The barrel adjuster fixes this by fine-tuning cable tension. Small adjustments restore crisp, accurate shifting without replacing any parts. Our detailed guide on adjusting mountain bike rebound covers related drivetrain tuning techniques.
C. Worn Derailleur Springs or Bent Components
Worn or gummed-up tension springs in the derailleur cause chain slack, leading to slipping. These springs are responsible for maintaining consistent chain tension as you shift through gears.
A bent derailleur hanger throws off the alignment and causes skipping only on certain gears. This often happens after the bike falls on its right side or takes an impact.
Bent cog teeth produce similar symptoms, with slipping limited to specific gears. Stand behind the bike and sight down the cassette and derailleur. Misalignment is usually visible when comparing the derailleur cage angle to the cassette cogs.
D. Insufficient Chain Lubrication
A dry chain creates friction, causing jerky movement and skipping under load. New chains sometimes ship with only minimal factory lubricant that wears off quickly.
Apply a proper bike-specific chain lube after installing a new chain. Run the chain through several gear cycles to distribute the lubricant into all the rollers and pins.
Wipe off excess lube with a clean rag. Too much lubricant attracts dirt and grit, which accelerates wear.
Is It Normal for a New Chain to Slip at First?
Minor slipping during the first 50 to 200 km is normal. This bedding-in period allows new chain surfaces to mesh and smooth out against the cassette teeth.
New components need time to settle. Slight shifting inconsistencies often resolve as the chain and cassette wear into each other during initial rides.
However, persistent slipping after 200 km signals a real problem. A worn cassette, bent component, or improper adjustment won’t fix itself with more riding.
Don’t ignore obvious slipping and hope it resolves on its own. If the chain skips hard under load from day one, diagnose and fix it immediately.
When Should You Replace the Chain and Cassette Together?

A chain checker tool tells you exactly when to replace components. At 0.5% wear, replace only the chain. At 0.75% wear or higher, replace both the chain and cassette together.
If your old chain was heavily worn before replacement, the cassette is almost certainly worn too. Installing a new chain on a worn cassette guarantees slipping because the components can’t mesh properly.
Replacing the chain and cassette together ensures both components start fresh with matching profiles. This extends overall drivetrain life and prevents the frustration of immediate slipping.
Budget accordingly: chains cost $15 to $50, depending on speed and brand. Cassettes range from $30 to $150 based on materials and gear count.
How to Prevent Chain Slipping in the Future
Lubricate your chain every 100 to 150 miles to reduce friction and wear. Use a bike-specific lube and wipe off excess after application.
Check chain wear monthly with a chain checker tool. Replace the chain before it reaches 0.5% stretch to protect your cassette from premature wear.
Ease off pedal pressure when shifting under load. Shifting hard during climbs accelerates wear on both chain and cassette teeth.
Keep your drivetrain clean. Dirt and grit act as a grinding paste that speeds up component wear. A quick wipe-down after dusty or wet rides makes a real difference.
Conclusion
A new bike chain slipping when pedaling hard usually comes down to one issue: a worn cassette that can’t grip fresh chain links. Start with quick fixes like adjusting the barrel adjuster, checking for stiff links, and verifying chain length. If slipping persists, replacing the cassette solves the problem.
Prevention is straightforward. Lubricate regularly, check chain wear monthly, and replace components before they wear out your other parts. A few minutes of maintenance saves hours of frustration and keeps your drivetrain running smoothly for thousands of miles.
For more bike maintenance guides and troubleshooting tips, explore BicycleXpert’s complete library of repair tutorials.